Conky by VSV


xplanetFX 2.1.1 - Other GNOME Wallpaper


xplanetFX is a daemon for rendering high quality views of mother earth as wallpaper in real-time (sun, moon and clouds). It comes with a handy GTK interface but is fully usable under CLI.

xplanetFX depends on xplanet and imagemagick and is available as DEB, RPM (untested) and TAR.GZ. The GUI uses pygtk and cairo.

A couple of available templates embed the renderings in different scenes and are downloadable as separate packages which can be easily installed by drag&drop to the themes list in the GUI or since 2.0 directly online via the themepool inside the application.

Features like delayed autostart multi language (japanese, czech, dutch, english, spanish, italian, french, russian, greek and german by now) and a lot of customization make xplanetFX an easy-to-use interface for xplanet drawing the earth in high quality.

The base images of the templates are mostly licensed under creative commons from flickr.com and some free texture stuff from the www.

A lot more information, the users manual and the templates can be obtained under the web adress.

There is a signed repository for the deb package available, please read the infos in the blog under "installation".

Debian(xplanetFX DEB)
Red Hat(xplanetFX RPM (untested))
other(xplanetFX TAR.GZ)

Increase the size of Compiz shadows


By default CCSM’s (CompizConfig Settings Manager) ‘Shadow Radius’ setting for Window Decorations the fixed at a maximum of 18; you’re unable to go higher using the slider or by adjusting the value box.
18 value max compiz ccsm
However, you are able to enter a value much greater than CCSM offer via gconf-editor:
  • Open up gconf-editor (ALT+F2 > gconf-editor)
  • Navigate to /apps/compiz/plugins/decoration/allscreens/options/
  • Change ‘shadow_radius‘ to a higher value; the effect will apply immediately for you to gauge reaction
gconf editing for compiz shadow
I played around, setting mine to 25 and then 48. The result was a very deep shadow that gives the appearance of ‘lifting’ windows off the page. Your tastes will likely vary, so have a play around with different values to find a setting that suits you.
Compiz radius shadow at 48
Compiz radius shadow at 25

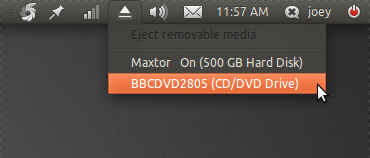
‘Ejector’ tray app adds indicator applet


Windows users miss an easily accessible tray icon for un-mounting their drives safely in Ubuntu should check out ‘Ejecter‘ (*), an nitfy tool that has recently received some new features…
It’s hard to waffle on about what ‘Ejecter’ does, after all the name kind of gives it away.
Suffice to say it provides convenient access for un-mounting external peripherals hard drives, DVD tray and USB sticks with little more than a click on the system panel.
Indicator Ejecter
When your device is ready to be unplugged from your computer a native Ubuntu notification bubble will appear.

Install

Maverick comes with an old version of the tray app available in the repositories. This works fine but for all the new features you’ll need to upgrade using the following PPA:
  • sudo add-apt-repository ppa:fredp/ppa
  • sudo apt-get update && sudo apt-get install ejecter
Ejecter adds itself your system start-up items and will launch automatically upon your next login.
*Ejecter is not a typo, it’s how the application is spelt


This is a clean beige theme based on Clearlooks and Murrine. It is inspired by the controls theme GTK2-H2O (author: ?). The corresponding Emerald theme is included.

Install LibreOffice 3.3 Ubuntu


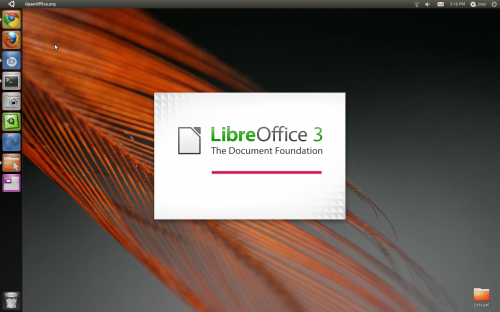
The first stable release of the free office suite ‘LibreOffice’ is now available for download.
Forked from OpenOffice late last year, LibreOffice 3.3 provides users with the familiar set of applications – albeit with greatly improved features such as: -
  • Import and work with SVG files
  • Easy way to format title pages and their numbering in Writer
  • Improved Navigator Tool for Writer
  • Improved ergonomics in Calc for sheet and cell management
  • Microsoft Works and Lotus Word Pro document import filters.
A detailed breakdown of new features in LibreOffice 3.3 can be found @libreoffice.org/download/new-features-and-fixes

Download LibreOffice

Enough with the chit chat how do you get a-hold of it? LibreOffice 3.3 can be downloaded in .deb format from libreoffice.org or, for Ubuntu 10.10 users, installed from the LibreOffice PPA using the following commands: -
sudo add-apt-repository ppa:libreoffice/ppa
sudo apt-get update && sudo apt-get install libreoffice
Ubuntu 11.04 testers will already have LibreOffice installed as it undergoes evaluation for as OpenOffice’s replacement.

Fix Realtek RTL8192SU Ubuntu driver


Here’s quick fix for annoyed users with Realtek RTL8192SU WiFi chipsets wanting some WiFi…
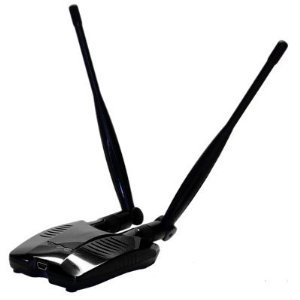
I just bought a new Wi-Fi dongle for my netbook (due to woes with the Broadcom card inside, but that’s a whole other post) and although my no-name budget £10 dongle boasted ‘Linux support’ on the packaging I was a mite miffed to find it incapable of mustering even a faint signal of anything when plugged into my Ubuntu 10.10-running device.
Doubly annoying given it works flawlessly in Natty…
So what’s up?
After Googling around I came up on a bug report titled “Please include firmware for RTL8192SU. The response was illuminating: -
“On 10.04 & 10.10 the firmware is already there but its in the wrong location.”
The solution to is open a terminal and pop in the following command: -
sudo cp -R /lib/firmware/RTL8192SE /lib/firmware/RTL8192SU
Reboot and, fingers crossed, your dongle will be up and receiving – certainly worked for me!
Need to find out what chipset your dongle uses? Plug it in, open a terminal and type ‘lsusb’. All connected USB devices will be listed.

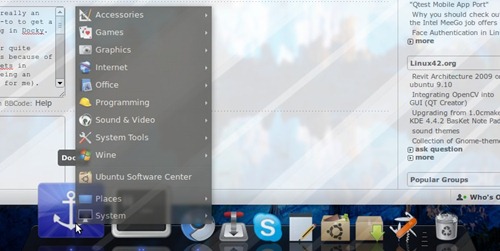
Add a main menu to Docky


Long for a ‘main menu’ on Docky?
138187-Screenshot
"I’ve been using AWN for quite sometime now, but that’s because of the lack of many docklets in Docky; the main-menu being an important one (at least for me)" he says on why he sought out a solution.
"What we do is change the "click" function of the Docky icon. So I modified that a bit, and got it to display the gnome-menu whenever I click the Docky icon."
Sounds neat, so how does one do it?
  1. Install "xdotool" (click here to install)
  2. Press ALT+F2 and type in "gconf-editor".
  3. Press enter.
  4. Navigate to /apps/docky-2/Docky/Items/DockyItem and double click on "DockyItemCommand"
  5. In the "value" field copy paste: xdotool key -clearmodifiers alt+F1
  6. Press OK and close the box.
  7. Click on the Docky icon

Remove anchor icon from Docky


Did you know that very recently Docky added the option to remove the Anchor icon from the dock? Oh yes!
OMG! reader kiwisoup e-mailed me over some instructions that I thought i’d paste here: -
  • Press ALT + F2
  • Type command “gconf-editor” and hit enter/return
  • Navigate to “apps/docky-2/docky/items/DockyItem” in the gconf-editor
  • Uncheck “ShowDockyItem
  • Restart Docky
Et voilĂ ! Anchor free Docky!

Terminal way

If you’re lazy and want to do this via the terminal you can do so using the following commands. (Thanks to commenter dRewsus)

This command will turn the icon off:
gconftool-2 --type Boolean --set /apps/docky-2/Docky/Items/DockyItem/ShowDockyItem False
this will turn it back on:
gconftool-2 --type Boolean --set /apps/docky-2/Docky/Items/DockyItem/ShowDockyItem True
Remember that you will need to restart Docky to see the changes take effect.

Find Us On Facebook

Related Posts Plugin for WordPress, Blogger... Linux Directory