Showing posts with label Guide. Show all posts

Change The Purple Background (Splash Screen) Ubuntu 12.04

In this tutorial we will see how to change the background image (splash screen) of the GRUB boot loader under Ubuntu 11.10/12.04 or older.


When you start your system, a boot menu will show up containing an ordered list of operating systems and kernels. This boot menu is black by default and can be customized as follows:

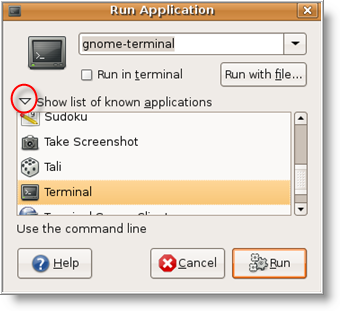
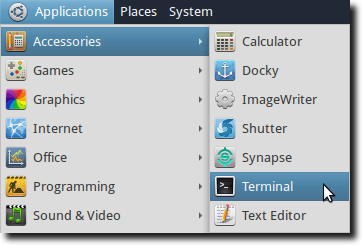
Start the Ubuntu terminal and install first the grub2-splashimages package with this command:
sudo apt-get install grub2-splashimages
GRUB spalsh images are stored in the /usr/share/images/grub folder, you can access it with this command:
sudo nautilus /usr/share/images/grub
If you want to use a custom image, make sure it is in the TGA format, then place it in that folder. After deciding which image to use as splash screen for the GRUB2 boot loader, edit now the /etc/default/grub file with this command:
sudo gedit /etc/default/grub
At the end of the file, add this line:
GRUB_BACKGROUND=/usr/share/images/grub/YOUR-IMAGE.tga
Replace YOUR-IMAGE.tga with your custom image name.


When you finish, press CTRL+Q and save your file. Run now this command:
sudo update-grub
Restart now your computer to see if changes are successful (hold down the SHIFT key to bring up the GRUB boot screen while rebooting).                                                                                                                              Source 

OR

The Best And Easy Way....

Install Grub Customizer, every settings are under Preferences.


Grub Customizer (2.5.7) Installation


For Ubuntu 12.04/Linux Mint 13, you can easily install Grub Customizer with the following commands:


sudo add-apt-repository ppa:danielrichter2007/grub-customizer
sudo apt-get update
sudo apt-get install grub-customizer


For openSUSE 12.1 or older, run the following commands:

(openSUSE 32-bit)


wget -O grub-customizer-2.5.7-i686.rpm http://goo.gl/vE2Ev
su
zypper in grub-customizer-2.5.7-i686.rp

(openSUSE 64-bit)


wget -O grub-customizer-2.5.7-x86_64.rpm http://goo.gl/1GL6
su
zypper in grub-customizer-2.5.7-x86_64.rpm

For Fedora 17 or older, you can install with these commands:

(Fedora 32-bit)

wget -O grub-customizer-2.5.7-i686.rpm http://goo.gl/vE2Ev
sudo yum install grub-customizer-2.5.7-i686.rpm

 (Fedora 64-bit)

wget -O grub-customizer-2.5.7-x86_64.rpm http://goo.gl/1GL6B
sudo yum install grub-customizer-2.5.7-x86_64.rpm

That's it!                                                                                                                                 source

Disable Apport Error Report Dialog in Ubuntu 12.04

In fresh Ubuntu 12.04 installation, it keeps popping up annoying apport error report dialog on every log-in even after sending the error report. This simple tutorial will show you how to disable this dialog in Ubuntu.


Open up terminal from the dash home or press Ctrl+Alt+T, edit “/etc/default/apport” file with this command: 

sudo gedit /etc/default/apport
Set enable=0:
enable=0

Save the file, and done!

Install Latest Chromium Browser 21 in Ubuntu 12.04 and Linux Mint

Chromium web browser, the open source version of Google Chrome has reached version 21. The Chromium daily build ppa has stopped updating the packages after version 18 was released. Tobias Wolf created a new ppa (for now) providing latest Chromium package for Ubuntu 12.04 Precise.
How to install the latest Chromium 21 in Ubuntu 12.04:
Open terminal from the dash home or press Ctrl+Alt+T, execute this command to add ppa:chromium-daily/ppa:

sudo add-apt-repository ppa:towolf/crack

Update source:
 
sudo apt-get update 
sudo apt-get install chromium-browser
If you have an old chromium installed, run this instead:
 
sudo apt-get upgrade

Install SunFlower 0.1a.42 Twin-Panel File Manager in Ubuntu 12.10/12.04/11.10/Linux Mint 13/12

Sunflower is Open Source, twin panel, small and highly customizable File Manager for Linux with plugins support. Sunflower main purpose is to create powerful and easy use of file manager. Sunflower is developed in python language.


To install SunFlower in Ubuntu/Linux Mint open Terminal (Press Ctrl+Alt+T) and copy the following commands in the Terminal:

  • sudo add-apt-repository ppa:atareao/sunflower
  • sudo apt-get update
  • sudo apt-get install sunflower

How to Make Firefox Faster on Linux Mint

Before making any changes, please make a backup of .mozilla/firefox/--------.default/prefs.js for your own safety. prefs.js is a file that stores all of your history and bookmarks from Firefox. 
  •  First open Firefox. 
  • Type "about:config" (without quotes) in the Firefox address bar and then click "Enter". This command opens a configuration page that allows the user to change advanced system settings in Firefox.
  • Speed up page loading/rendering time in Firefox. Right-click anywhere in the "about:config" window, click on "New" and then select "String". Name the string "nglayout.initialpaint.delay" (without quotes). Enter a value of "0" and then click "OK". This tweak decreases the amount of time Firefox waits to render a page from 250 milliseconds to zero. Make the same process and name the string "content.notify.interval" and enter a value of "0".
  • Force Firefox to release reserved system RAM when the browser is minimized. Right-click anywhere in the "about:config" window, click on "New" and then select "Boolean". Name the entry "config.trim_on_minimize" (without quotes). Change the value to "True" and then click "OK". This setting forces Firefox to only reserve about 10 MB of system memory while minimized.
  • Normally Firefox only sends one or two tunnels to the website. However, the more tunnels you use the faster you go. To change this, type in filter bar "network.http.pipelining.maxrequests" and change the value to "150".
  • Attention: The more tunnels you use, the more bandwidth you use, meaning you could use as tunnels as you want but that would probably kill the sites bandwidth if everyone did that. 150 is a very good value.
  • Type "network.http.pipelining" in filter bar, and set it to "True" by double clicking it.
  • Type "network.http.proxy.pipelining" in filter bar, and set it to "True" by double clicking it.

Monitor System Resources in Ubuntu 12.04 LTS

This tutorial shows how to monitor your Ubuntu system resources such as usage of processor, memory, network, hard disk and also cpu/motherboard temperature, cpu fan speed.
There’s a good system load indicator for Ubuntu monitoring cpu usage, cache, memory, network, etc. And psensor is a gtk+ application monitoring temperatures and fan speeds.

1. Install system load indicator

Open up a terminal (Ctrl+Alt+T) and install it from ppa:indicator-multiload/stable-daily. You can use graphical way adding ppa

sudo add-apt-repository ppa:indicator-multiload/stable-daily
sudo apt-get update
sudo apt-get install indicator-multiload


2. Install psensor to monitor temperatures and fan speeds

First install lm-sensor, and start detect hardware sensors:

sudo apt-get install lm-sensors sudo sensors-detect

Install Psensor from this ppa:jfi/ppa

sudo apt-add-repository ppa:jfi/ppa
sudo apt-get update
sudo apt-get install psensor

 
3. Launch startup applications from the dash, add the two indicator as auto-start at login.
in command area:
  • system load monitor use indicator-multiload
  • psensor use psensor

Speed up your Ubuntu 12.04 with preload

Preload is nice little application that could make your linux system a lot faster. Preload is an adaptive readahead daemon. It monitors applications that users run, and by analyzing this data, predicts what applications users might run, and fetches those binaries and their dependencies into memory for faster startup times.

Preload packages are available for almost all linux distributions. And it is available by default in the Synaptic Package Manager and Ubuntu Software Center in Ubuntu. Alternatively, you can install it via Terminal. Type this command

 sudo apt-get install preload

Thats it. Preload will run silently in the background. If you want to further tweak Preload, conf file is available at /etc/preload.conf.

Note that installing preload will not make your system boot faster and that preload is a daemon that runs with root priviledges.

And see the difference.

How to: Enable screen lock in Linux Mint 13

In Linux Mint 13, the screen lock feature is disabled by default. After being idle for a while, the screen will be dimmed and you can re-activate it by moving the mouse or hit a key. For security reasons, you may want to enable the screen lock feature. Here is how to do it:

Hit Alt + F2 and run "mateconf-editor" to open the Mate configuration window. Go to apps > mate-screensaver then check the line "lock_enabled". You can also edit the line idle_delay to change the minutes of inactivity time before the screen lock is activated.

Ubuntu 12.04 Applications Shortcuts


Here are Ubuntu 12.04 Applications shortcuts. Key combos for LibreOffice, Gwibber, Shotwell, Firefox, Rhythmbox and more are covered in the comprehensive document.
To Download zip file scroll down. 

Source: OmgUbuntu


 Here are Unity Shortcuts which is useful for Ubuntu 12.04 Unity.

 Download Unity and Apps Shortcuts

Remove White Dots from Login Screen of Ubuntu 12.04 Precise Pangolin

ome People don't like white dots in Ubuntu 12.04 Login screen, So here is a tweak you can easily remove these dots from login screen.


To Remove White Dots from Ubuntu 12.04 login Screen open Terminal (Press Ctrl+Alt+T) and copy the following commands in the Terminal:
  • sudo xhost +SI:localuser:lightdm 
  • sudo su lightdm -s /bin/bash 
  • gsettings set com.canonical.unity-greeter draw-grid false 
 Here are more tweaks for Ubuntu 12.04 Precise Pangolin. Important Tweaks and Some more Tweaks. That's it, Enjoy

Visit on Site http://www.noobslab.com

Speed Up Your Internet Connection On Ubuntu

In this tip, we are going to apply a simple modification that can help you speed up your Internet connection and optimize page load time. The modification will be made to the nsswitch.conf file and it is valid for Ubuntu, Debian Squeeze & Wheezy.

Open the Terminal and run one of these commands to edit the nsswitch.conf file:

sudo gedit /etc/nsswitch.conf
or
sudo nano /etc/nsswitch.conf

Locate this line:
hosts:          files mdns4_minimal [NOTFOUND=return] dns mdns4

And add just below it this line:
hosts:          files dns

Save now the file and close it.


You will now see an improvement in your Internet connection speed, but don't expect a major improvement. Good Luck!

Restore Panels In Ubuntu Back To Their Default Settings

Messed up your panels in Gnome? Maybe your new to Ubuntu and accidentally deleted items or the panel itself and now you can't figure out how to get it back.
 
Sure, you can add a new panel and rebuild it by adding the items back on the panel.
Instead of going through the trouble, there is an easy fix that will restore your panels back to their default settings quickly.

Open up a Terminal window, by clicking on Applications \ Accessories \ Terminal. Or, if you deleted the top panel and cannot access the menus, just press ALT+F2 and in the run dialog box, type gnome-terminal then click on Run.

You can also browse for applications, such as Terminal from the Run window, by clicking on the arrow icon next to 'Show list of known applications" and browse for Terminal.


gnomedefaultpanel.png


Once the Terminal window opens, enter the following command at the prompt:

gconftool-2 – -shutdown

(Note: There should be no spaces between the two dashes before shutdown.)
EDIT – Reader nickrud has suggested a better method instead of shutting down gconfd. Instead use the following command (thanks nickrud!)

gconftool – -recursive-unset /apps/panel

(Remember: There should be no spaces between the two dashes before shutdown.)
Then enter the next command:

rm -rf ~/.gconf/apps/panel

And enter one more command:

pkill gnome-panel

That's it!

Both top and bottom panels will appear (if missing) with their default settings. Now you can customize them to your preference and get on with using Ubuntu.


Source: ethernal.org

Make Ubuntu distribution updates faster

Ubuntu 11.04 has just been released and if like me you're getting errors "Cannot download release notes" this is because the servers will be overloaded.
To make your download faster and put less pressure on the update servers open Update Manager, click "Settings", click the first tab "Ubuntu Software", select "Other" in the "Download From" box then click the "Best Server" button, this will choose the fastest server. The more users that do this the more the load is spread and quicker updates will be.


source : http://blog.rwky.net

Trash Indicator for Ubuntu

Ever felt that emptying the trash can in Ubuntu required too many clicks or too much effort?
If so you might be lazy, but the following Trash Can indicator might just prove more in keeping with your workflow…


Trash indicator shows how many items are currently in the trash can, along with a menu item to quickly ‘empty’ the trash, too.
The developer of the applet, Michael J, told us: -
“I’ve never been fond of the big desktop trash icons or one taking up space in a dock, so I have tucked the trash into a nice and tidy indicator. Kind of surprised no-one else has done this already.”

Download

An easy-to-install .DEB package of Trash Indicator can be downloaded on the official project home @ code.google.com/p/trashindicator/

The applet works with Ubuntu 10.04, 10.10 and Ubuntu 11.04.
And all credit to Joey Sneddon,

Enable DVD Playback in Ubuntu 11.04

Playback of DVDs in Ubuntu 11.04 is not enabled out of the box. Thankfully setting it up takes no time at all.
Have you enabled it? If not you can find out by inserting a DVD into your disc drive/slot and choosing to ‘Play’ it with Ubuntu’s default media player. The following error will greet you: -


Ways to enable DVD playback in Ubuntu

Fluendo

Enabling DVD playback in Ubuntu is simple enough, and there are various ways to do it. Some might say the easiest – as well as the most legally unquestionable- is to purchase the Fluendo DVD Playback software from the Ubuntu Software Centre.

Libdvdcss

If you’d prefer to spend the Fluendo costs on physical DVDs rather than DVD software, you can enable DVD playback in your faovurite application by installing a package called ‘libdvdcss’.
‘libdvdcss’ is a small library file that accesses DVDs “…like a block device, without having to bother about the decryption.”
Hit the buttons below to download a .DEB package of libdvdcss from the medibuntu repositories.
Download libdvdcss for Ubuntu 11.04
Download libdvdcss for Ubuntu 11.04 64bit
Once the .deb file has downloaded just double-click on it to begin installation.
After installation has finished you can open your favourite media player and DVD playback will be supported.


the credit goes to..

How-To Remove Old Kernel Entries From GRUB [Video]

As you may know, some people find Linux to be really challenging when they first try it out.
Because of this, I have launched a new segment called: “Ubuntu is Easy” and thought the OMG! Ubuntu! community – in the true nature of open source – could also assist Ubuntu newbies in finding their way around this great operating system.
In this tutorial I show you how to get rid of all of those extra boot menu entries that the system updater adds. These aren’t just menu entries, they’re actually different versions of the kernel, the core of a Linux operating system, so they take up space on your hard drive.
Watch to find out how to fix this problem, the easy way.


What topics do you think new users would find difficult?

Feel free to reply below, or write me on my Twitter or Facebook!

A Surprisingly Easy Tip for Upgrading Ubuntu

Some versions of Ubuntu don’t automatically give you the option to upgrade to the latest version. In this week’s Ubuntu is Easy segment, I show you the easy way to upgrade Ubuntu to the latest release, which as of when this video was released is 11.04, Natty Narwhal!
Thanks for all your previous feedback with my last video! I came up with “Ubuntu is Easy” to help new Ubuntu users get more familiar with their new Linux operating system and see that you don’t have to be an expert with the command line to get things done.
Video produced on Linux Mint 10 using Kdenlive, Audacity, and GIMP.


Do you find the GUI works just as well as the CLI for upgrading?

Feel free to reply below, or write me on my Twitter or Facebook!

Laptop Mode Tools - Laptop power saving package for Linux systems

Laptop Mode Tools is a laptop power saving package for Linux systems. It allows you to extend the battery life of your laptop, in several ways. It is the primary way to enable the Laptop Mode feature of the Linux kernel, which lets your hard drive spin down. In addition, it allows you to tweak a number of other power-related settings using a simple configuration file.

Ubuntu has a laptop-mode-tools package, which is installed by default on laptops. However, laptop mode is disabled by default in Ubuntu Edgy (6.10), because some people have been experiencing hangups with it on certain laptops (mostly Thinkpads). Until now, nobody has any clue what is happening here. To reenable laptop mode, edit /etc/default/acpi-support and set ENABLE_LAPTOP_MODE=true.

If you want to use the latest version of laptop mode tools, you can use the Debian packages, they are compatible enough to work out-of-the-box on Ubuntu. In fact, I would definitely advise using these packages -- the Ubuntu packages are crippled so that some options don’t work, the most notable of which are ENABLE_LAPTOP_MODE_ON_AC, ENABLE_LAPTOP_MODE_WHEN_LID_CLOSED and DISABLE_LAPTOP_MODE_ON_CRITICAL_BATTERY_LEVEL.

Install Laptop Mode Tools on ubuntu
Make sure you have a kernel that supports laptop mode. Any version starting from 2.6.6 should do, or any version that includes the file /proc/sys/vm/laptop_mode.
Now you need to download lastes version of .deb package from here
Once you have deb package you can install by double clicking on that or run the following command from your terminal

sudo dpkg -i laptop-mode-tools_1.47-1_all.deb

If everything went OK, laptop mode will be activated automatically the next time you unplug your laptop from the mains (except when you have an APM laptop). You can configure laptop mode tools using the config file, which is in /etc/laptop-mode/laptop-mode.conf. You can read more about the configuration options using
man laptop-mode.conf

Udev Discover - Tool for udev testers, coders, hackers and consumers

Udev discover aims for being a gnome-device-manager-like app using gudev instead of HAL, and to provide some fancy features for udev users and hackers.

Main features:
Browsing the sysfs tree via udev
Reports udev device info and udev properties
Filter and search devices
Monitorize udev device events

Install Udev Discover on ubuntu Natty
Open the terminal and run the following commnads
sudo apt-add-repository ppa:fontanon/udev-discover
sudo apt-get update
sudo apt-get install udev-discover
You can run this application using the following command from your terminal
udev-discover
Screenshot

Search, View, Download & Convert YouTube Videos in Linux


If you’re a Linux user looking for a user-friendly, simple way to search for, view, download, and even convert videos from YouTube (and more), then a project called Gmediafinder might be just what you’ve been looking for.
YouTube is a great way to find user-submitted videos, but for some people, YouTube – and any website that uses Flash – isn’t an option, either because of their computer’s speed or simply because they don’t want to install Adobe Flash.  Regardless, one of Gmediafinder’s advantages is that it does everything without using Flash.
Installing Gmediafinder is simple, for the most part.  First, head over to the Gmediafinder entry at GTK-apps.

Gmediafinder GTK Apps Page

Read up on what it can do, and if it sounds like something you’d like to try out, scroll down to the download links.  At the moment, you can download the source code or a package for Mandriva.

Download Options

Ubuntu users also have the option of installing Gmediafinder via a personal package archive, which has the advantage of automatically installing prerequisites, as well as keeping your copy always up-to-date.  To do this in Ubuntu, first open a Terminal.

Open Terminal

Then type the following, which will add the Gmediafinder PPA to your software lists, update those lists, and then finally install Gmedia and any required libraries.
sudo apt-add-repository ppa:s-lagui/ppa && sudo apt-get update && sudo apt-get install gmediafinder. 
Once installed, you’ll find Gmediafinder in your Applications menu, under Sound & Video.

Launch Gmediafinder

Gmediafinder has a nicely laid out interface, with obvious options that should be simple to figure out for most users.

Gmediafinder Interface

The top four buttons, labeled PlaylistDownloadsSettings and About are easy access buttons that take you to the Playlist screen (shown), to the Downloads interface (discussed below), to the Settings window or to the About screen.
Below that is where you select the engine you want to search.  As mentioned, Gmediafinder supports YouTube for videos, Google for basic searches, as well as a host of MP3 sites.

Supported Search Engines

Once you’ve selected your search engine, enter what you want to find in the search box, and hit the Find button (or hit Enter on your keyboard).  Here we’ve searched YouTube for “Phish” and are watching a video, right in the main window.

Viewing YouTube Video

If we want, we can use the Playlist Options (at the bottom of the Playlist window), to either continue or loop through the playlist, for a neverending stream of videos (or music).  And we can download using Gmediafinder as well.  For MP3s, simply click the download button. YouTube videos can be downloaded in any of the supported sizes and formats; simply choose the one you want and click the download button.

Downloading Videos

The built-in download manager is informative, but at the moment a little basic.  For instance, there’s currently no way to pause, or even cancel downloads, without resorting to quitting the program altogether.  And if you do quit the program in the middle of a download, that download is lost forever; you can’t restart Gmediafinder and pick up where you left off.
When a download is complete, you’ll see a few new buttons to the right of the progress field.

Download Complete Options

The first button is for deleting the entry from the download manager, the second – found only beside downloaded videos – is for converting the video’s audio to MP3, and the last is to view the file just downloaded.  Converting to MP3 is a nice touch, as you may find a custom remix of a song you want to listen to, without viewing the video.  The function works well, but at the moment you have no control over the quality of the conversion.
In fact, Gmediafinder is pretty much lacking in configuration options.

Gmediafinder Options

But don’t let the single YouTube option dissuade you from trying Gmediafinder.  It’s fast, easy to use, and for searching, viewing/listening, downloading and converting, it’s a tough combination to beat.

Find Us On Facebook

Related Posts Plugin for WordPress, Blogger... Linux Directory