
Faenza 0.8 GNOME Icon Theme
Download the tar.gz file and extract it. In the new folder created, run the ./INSTALL script to choose the distribution logo (Ubuntu, by default) and the Gnome menu icon. If run as root, the script will copy the iconsets to /usr/share/icons to made them available to all users. Some default icons used by Rhythmbox and Dockmanager may be also replaced.
Launchpad PPA
You can also install the folowing packages:
To display the Faenza icon, edit as root the /usr/share/applications/application_name.desktop file and locate the line beginning with 'Icon='. Replace the fullpath icon name by the one of the Faenza icon (usually, it's the name of the application itself) without the extension. Don't forget to make a backup before changing one of those files. In some cases, you need to reinitialize the item in Gnome menu editor to display the new icon. Vim desktop file is /usr/share/applications/gvim.desktop.
Enable Transparent Gnome Panels/Menus/Windows in Ubuntu 10.10
Do you want to customize your Ubuntu desktop with the transparent panels, menus, and windows? As we know, Compiz can do the job, but what if you don't need a complete transparency and want the font and controls/buttons is still perfectly visible?
This tutorial is about how to enable RGBA transparency in Gnome desktop, and this might be what you want.
Preparation :

To get RGBA transparency enabled in your Ubuntu, first you need to install and enable graphics driver properly.

And in right-click desktop menu "Change Desktop Background" option Visual Effects tab, make sure Normal or Extra was enabled.
Installation:
Open up a teminal from Appications -> Accessoires menu and add the PPA:
sudo add-apt-repository ppa:erik-b-andersen/rgba-gtk
sudo apt-get update
sudo apt-get upgrade
Now, install gnome-color-chooser and you can use it to enable RGBA:
sudo apt-get install gnome-color-chooser gtk2-module-rgba
Launch gnome-color-chooser at System > Preferences > Gnome Color Chooser. Go to Engines tab, tick "Global" and select "Murrine" in the drop-down box.
Now, click Preferences button to go to its configuration window and check the two check-boxes after "Configuration of Enable/Disable RGBA support"
Finally, logout and back in.
Note:
1. You can also install murrine themes with below command, and use it in right-click desktop -> Change Desktop Background -> Theme tab -> click Customize button.
sudo apt-get install murrine-themes
2. Due to bugs, the panel is only partially transparent and only GTK+ applications support RGBA transparency.
Screenshot:

This tutorial is about how to enable RGBA transparency in Gnome desktop, and this might be what you want.
Preparation :

To get RGBA transparency enabled in your Ubuntu, first you need to install and enable graphics driver properly.

And in right-click desktop menu "Change Desktop Background" option Visual Effects tab, make sure Normal or Extra was enabled.
Installation:
Open up a teminal from Appications -> Accessoires menu and add the PPA:
sudo add-apt-repository ppa:erik-b-andersen/rgba-gtk
sudo apt-get update
sudo apt-get upgrade
Now, install gnome-color-chooser and you can use it to enable RGBA:
sudo apt-get install gnome-color-chooser gtk2-module-rgba
Launch gnome-color-chooser at System > Preferences > Gnome Color Chooser. Go to Engines tab, tick "Global" and select "Murrine" in the drop-down box.
Finally, logout and back in.
Note:
1. You can also install murrine themes with below command, and use it in right-click desktop -> Change Desktop Background -> Theme tab -> click Customize button.
sudo apt-get install murrine-themes
2. Due to bugs, the panel is only partially transparent and only GTK+ applications support RGBA transparency.
Screenshot:
fern-wifi-cracker
Wireless security auditing application

This is a wireless security auditing application that is written in python and uses python-qt4. This application uses the aircrack-ng suite of tools.
It should work on any version of linux running the following:
Requirements:
python
python-qt4
macchanger
aircrack-ng
xterm
To install simply run the following command in terminal after changing directory to the path were the downloaded package is:
dpkg -i Fern-Wifi-Cracker_1.1_all.deb
Software Icon can be found at the application Menu of the GNOME desktop interfaces
Icon can also be found at /usr/share/applications for KDE and also GNOME:
There you find "Fern_Wifi_Cracker.desktop"
Downloads:
http://fern-wifi-cracker.googlecode.com/files/Fern-Wifi-Cracker_1.1_all.deb
Guide to using apt-get
apt-get is the command-line tool for handling packages, and may be considered the user’s “back-end” to other tools using the APT library. APT is actually both a library and a front-end for dpkg to work with Debian’s .deb packages. It’s designed to track package dependencies, call dpkg and make the software installation easy.Note: This entry is written with Ubuntu users in mind, hence the use of sudo when root access is required.
Package installation
Install a new package like follows:
sudo apt-get install foobarYou can also install multiple packages with one line, just separate the package names with a space:
sudo apt-get install foobar1 foobar2 foobar3All required dependencies by the package(s) specified for installation will also be retrieved and installed.
Search
(OK, so you don’t use apt-get for searching, but
apt-cache. Still comes in pretty handy though.) When you can’t remember the correct package name then you can search package names and descriptions usingapt-cache search foobarOr, for a fuzzy search try
apt-cache search fooThis can result in a long list, every package that includes ‘foo’ anywhere in its name or description will be listed. To narrow it down to package names, or packages with words in their descriptions, which start with ‘foo’ try
apt-cache search ^fooFor names/words that end with ‘foo’ try
apt-cache search foo$Installation from source
Instead of APT fetching the pre-built .deb for a package you can also use APT to build the package from its source code and get an optimised version for your system. Generally debs are absolutely fine to install, but you could see performance increases with CPU intensive packages (e.g. ffmpeg).
sudo apt-get build-dep foobar
sudo apt-get -b source foobar
The first line causes
apt-get to install/remove packages in an attempt to satisfy the build dependencies for the package foobar. The second line fetches the source package for foobar. It finds and downloads the newest available version of that source package into the current directory. Source packages are tracked separately from binary packages via deb-src type lines in the /etc/apt/sources.list file. This probably will mean that you will not get the same source as the package you have installed or as you could install. With the -b option specified the package will be compiled to a binary .deb using dpkg-buildpackage. Depending on the package this can take a long time.Once built, install the package with
sudo dpkg -i foobar-version-number.debPackage removal and clean-up
To remove a package use
sudo apt-get remove foobarThe software package will be removed, but all of its configuration files will be left behind. This could come in handy if you ever plan on re-installing the package, everything will be back to the way it was before the uninstall.
To remove a package complete with its configuration files use
sudo apt-get --purge remove foobarWhat happens to dependencies that were installed with the package? They are left behind. To clean these up use
sudo apt-get autoremoveautoremove removes packages that were automatically installed to satisfy dependencies for some package and that are no longer needed. If you have been trying out a lot of software then this might free up some disk space.sudo apt-get autocleanautoclean clears out the local repository (/var/cache/apt/archives/ and/var/cache/apt/archives/partial/) of retrieved package files that can no longer be downloaded and are largely useless. This allows a cache to be maintained over a long period without it growing out of control.sudo apt-get cleanclean is more thorough than autoclean. It removes everything but the lock file from/var/cache/apt/archives/ and /var/cache/apt/archives/partial/. You will likely want to run apt-get clean from time to time to free up disk space.Upgrade
There are two ways to upgrade your system. First a software update:
sudo apt-get update
sudo apt-get upgrade
This installs the newest versions of all packages currently installed on the system. Packages currently installed with new versions available are retrieved and upgraded; under no circumstances are currently installed packages removed, or packages not already installed retrieved and installed. New versions of currently installed packages that cannot be upgraded without changing the install status of another package will be left at their current version. An update must be performed first so that apt-get knows that new versions of packages are available.
Second, a distro upgrade:
sudo apt-get update
sudo apt-get dist-upgrade
dist-upgrade in addition to performing the function of upgrade, also intelligently handles changing dependencies with new versions of packages; apt-get has a “smart” conflict resolution system, and it will attempt to upgrade the most important packages at the expense of less important ones if necessary. The /etc/apt/sources.list file contains a list of locations from which to retrieve desired package files.source : http://www.larryni.me.uk/blog/
Elegant Gnome Pack on Ubuntu

This is a project that provides an automatic configuration of your GNOME desktop just in one click, with the backup and restoring support.
The main goal of this projects is to create the most complete dark theme for the GNOME desktop with easy installation experience.
You must have this stuff installed on your system before you'll start:
Murrine GTK engine 0.98.0 or higher
Droid Sans Font
Nautilus Elementary (optional)
The pack contains the following stuff :
GUI utility to configure your desktop
Icon theme: Elegant-AwOken based on the AwOken icon set by alecive
GTK+ theme: Elegant GTK theme v 4.0
Cursor Theme: Neutral++ by ducakar
Wallpaper: gDIGE by *Muscarr
Keyboard layout indicator flags
Firefox theme
Google Chrome theme by Jorge Carrillo
Google Chrome scrollbar extension
Google Chrome selection extension
Smplayer theme
Pidgin buddy list theme by Szabo Istvan
Ubuntu Lucid/Maverick and Linux Mint 9/10 installation instructions:
1. Install Elegant GNOME:
sudo add-apt-repository ppa:elegant-gnome/ppa
sudo apt-get update && sudo apt-get upgrade
a)sudo apt-get install elegant-gnome
or
b)sudo apt-get install elegant-gnome-mint
2. Go to "Applications -> Accessories -> Elegant GNOME"
1. Install Nautilus Elementary: (optional)
sudo add-apt-repository ppa:am-monkeyd/nautilus-elementary-ppa
sudo apt-get update && sudo apt-get upgrade 2. Run Elegant GNOME app
3. Choose Configure Nautilus -> Nautilus Elementary
To install the pack from sources:
1. Download the archive and extract it
2. Open the terminal and cd to the extracted directory.
3. Run the command "make "(e.g. "make ubuntu").
run "make help" to see the available variants.
4. Run the command "sudo make install".
5. Go to "Applications -> Accessories -> Elegant GNOME".
6. Optional step. If you use the Nautilus Elementary:
a) Go to Applications -> Accessories -> Elegant GNOME
b) Choose "Configure Nautilus"
c) Select "Nautilus Elementary"
To remove the pack:(installed from sources)
1. Open the terminal and cd to the extracted directory.
2. Run the command "sudo make uninstall"
To install the Google Chrome theme:
1. Download and extract the "Google Chrome" archive
2. Drag and drop the *.crx files into the Google Chrome window.
Ubuntu Keyboard Shortcuts For Linux Power Users
Get lightning fast and clever at the command line
You can use keyboard shortcuts and other command line tricks to make entering commands easier and faster. You might already know about the ‘tab’ key which completes partial commands and even file and directory names.
Here are some other keyboard shortcuts you can use within terminal:
Ctrl-a Move to the start of the line.
Ctrl-e Move to the end of the line.
Ctrl-a Move to the start of the line.
Ctrl-e Move to the end of the line.
Alt-] x Moves the cursor forward to the next occurrence of x.
Alt-Ctrl-] x Moves the cursor backwards to the previous occurrence of x.
Ctrl-u Delete from the cursor to the beginning of the line.
Ctrl-k Delete from the cursor to the end of the line.
Ctrl-w Delete from the cursor to the start of the word.
Ctrl-y Pastes text from the clipboard.
Ctrl-l Clear the screen leaving the current line at the top of the screen.
Ctrl-x Ctrl-u Undo the last changes. Ctrl-_
Alt-r Undo all changes to the line.
Alt-Ctrl-e Expand command line.
Ctrl-r Incremental reverse search of history.
Alt-p Non-incremental reverse search of history.
!! Execute last command in history
!! Execute last command in history
!abc Execute last command in history beginning with abc
!n Execute nth command in history
^abc^xyz Replace first occurrence of abc with xyz in last command and execute it
Also don’t forget to check out 4 websites where you can learn cool command line tricks
Install Grimwepa Ubuntu 10.10

Installation
Installation is not required for GRIM WEPA to run properly, but it is recommended if you use are going to GRIM WEPA frequently.
GrimWepa can be downloaded and installed by running
wget http://grimwepa.googlecode.com/files/grimwepa1.10a6.jarTo run GRIM WEPA, navigate to the file's location in Terminal and type:
java -jar grimwepa1.10a6.jarRun GRIM WEPA as root!
* for better cracking please use good wifi booster and install best driver to it.
* we personally recommend you to use Wifite wifi craker.
* for better cracking please use good wifi booster and install best driver to it.
* we personally recommend you to use Wifite wifi craker.
Install Wifite Ubuntu 10.10


introduction
designed for Backtrack4 RC1 distribution of Ubuntu. Linux only; no windows or osx support.
purpose
to attack multiple WEP and WPA encrypted networks at the same time. this tool is customizable to be automated with only a few arguments. wifite can be trusted to run without supervision.
features
- this project is available in French: all thanks goto Matt² for his excellent translation!
- sorts targets by power (in dB); cracks closest access points first
- automatically deauths clients of hidden networks to decloak SSIDs
- numerous filters to specify exactly what to attack (wep/wpa/both, above certain signal strengths, channels, etc)
- customizable settings (timeouts, packets/sec, channel, change mac address, ignore fake-auth, etc)
- "anonymous" feature; changes MAC to a random address before attacking, then changes back when attacks are complete
- all WPA handshakes are backed up to wifite.py's current directory
- smart WPA deauthentication -- cycles between all clients and broadcast deauths
- stop any attack with Ctrl+C -- options: continue, move onto next target, skip to cracking, or exit
- switching WEP attack methods does not reset IVs
- intel 4965 chipset fake-authentication support; uses wpa_supplicant workaround
- SKA support (untested)
- displays session summary at exit; shows any cracked keys
- all passwords saved to log.txt
- built-in updater: ./wifite.py -upgrade
requirements
- linux operating system (confirmed working on Ubuntu 8.10 (BT4R1), Ubuntu 10.04.1)
- tested working with python 2.4.5 and python 2.5.2; might be compatible with other versions,
- wireless drivers patched for monitor mode and injection: backtrack4 has many pre-patched drivers,
- aircrack-ng (v1.1) suite: available via apt: apt-get install aircrack-ng or by clicking here,
- xterm, python-tk module: required for GUI, available via apt: apt-get install python-tk
- macchanger: also available via apt: apt-get install macchanger
- pyrit: not required, optionally strips wpa handshake from .cap files
execution
download the latest version:
wget -O wifite.py http://wifite.googlecode.com/svn/trunk/wifite.pychange permissions to executable:
chmod +x wifite.pyexecute:
python wifite.pyor, to see a list of commands with info:
./wifite.py -help* for better cracking please use good wifi booster and install best driver to it.all the password will be save at user folder as log.txt
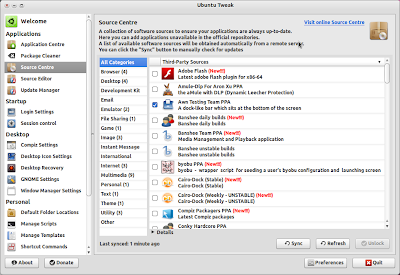
How to install ubuntu-tweak in Ubuntu
Features of Ubuntu Tweak
* Auto Start Program Control
* Quick install popular applications
* Show/Hide and Change Splash screen
* Show/Hide desktop icons or Mounted Volumes
* Show/Hide/Rename Computer, Home, Trash or Network icon
* Tweak Metacity Window Manager’s style and behaviour
* Compiz Fusion settings, Screen Edge Settings, Window Effect Settings, Menu Effect Settings
* Set the Shortcuts to archive quicker access your favourite applications
* GNOME Panel Settings
* Nautilus Settings
* Advanced Power Management Settings
* System Security Settings
* And many other in process…
* Quick install popular applications
* A lot of third-party sources to keep applications up-to-date
* Clean unneeded packages or cache to free disk space* Show/Hide and Change Splash screen
* Show/Hide desktop icons or Mounted Volumes
* Show/Hide/Rename Computer, Home, Trash or Network icon
* Tweak Metacity Window Manager’s style and behaviour
* Compiz Fusion settings, Screen Edge Settings, Window Effect Settings, Menu Effect Settings
* Set the Shortcuts to archive quicker access your favourite applications
* GNOME Panel Settings
* Nautilus Settings
* Advanced Power Management Settings
* System Security Settings
* And many other in process…
Open the terminal and run the following commands
sudo add-apt-repository ppa:tualatrix/ppasudo apt-get updatesudo apt-get install ubuntu-tweakUsing Ubuntu Tweak
You can open from Applications--->System Tools--->Ubuntu Tweak
Another Conky Config By M Jaafar Sg Koyan

The Config..
# UBUNTU-CONKY# A comprehensive conky script, configured for use on# Ubuntu / Debian Gnome, without the need for any external scripts.## Based on conky-jc and the default .conkyrc.# INCLUDES:# - tail of /var/log/messages# - netstat connections to your computer## -- osman (eosm88@yahoo.com)## Create own window instead of using desktop (required in nautilus)own_window yesown_window_type overrideown_window_transparent yesown_window_hints undecorated,below,sticky,skip_taskbar,skip_pager# Use double buffering (reduces flicker, may not work for everyone)double_buffer no# fiddle with windowuse_spacer nouse_xft yes# Update interval in secondsupdate_interval 3.0# Minimum size of text area# minimum_size 250 5# Draw shades?draw_shades no# Text stuffdraw_outline no # amplifies text if yesdraw_borders nofont Sans:size=9:weight=bolduppercase no # set to yes if you want all text to be in uppercase# Stippled borders?stippled_borders 3# border marginsborder_margin 9# border widthborder_width 10# Default colors and also border colors, grey90 == #e5e5e5default_color greyown_window_colour brownown_window_transparent yes# Text alignment, other possible values are commented#alignment top_leftalignment top_right#alignment bottom_left#alignment bottom_right# Gap between borders of screen and textgap_x 12gap_y 12# stuff after ‘TEXT’ will be formatted on screenTEXT$color${color orange}SYSTEM${hr 2}$color${color red}${alignc}$sysname ${pre_exec lsb_release -d | cut -f 2| tr "[:upper:]" "[:lower:]"}$colorMachine:${alignr}$nodenameUptime:${alignr}$uptimeProcesses:${alignr}$running_processes/$processesKernel:${alignr}$kernelBattery: ${battery_percent BAT0}% ${alignr}${battery}${color orange}CPU ${hr 2}$color${freq}MHz Load: ${loadavg}${alignr}Temp:${acpitemp}${cpubar 10,300 000000 ffffff}${cpugraph 10,300 000000 ffffff}CORE0:${color grey}${cpugraph cpu1 10,300 00ff0c 00ff0c }CORE1:${color grey}${cpugraph cpu2 10,300 00ff0c 00ff0c }NAME $alignr PID $alignr CPU $alignr MEM${top name 1} $alignr${top pid 1} $alignr${top cpu 1} $alignr${top mem 1}${top name 2} $alignr${top pid 2} $alignr${top cpu 2} $alignr${top mem 2}${top name 3} $alignr${top pid 3} $alignr${top cpu 3} $alignr${top mem 3}${top name 4} $alignr${top pid 4} $alignr${top cpu 4} $alignr${top mem 4}${color orange}MEMORY / DISK ${hr 2}$colorRAM: $memperc% ${membar 10}$colorSwap: $swapperc% ${swapbar 10}$colorRoot: ${fs_free_perc /}% ${fs_bar 10 /}$color${color orange}TIME ${hr 2}$color${alignc 59}${font sans-serif:bold:size=26}${time %H:%M:%S}${font}${alignc}${font sans-serif:bold:size=8}${Time %A %d %b %Y}${font}${color orange}NETWORK ${hr 2}$color${if_existing /proc/net/route wlan0}$alignc ....Wireless....WAN IP:$alignr${execi 3600 wget -O- http://whatismyip.org/ | tail}IP address: $alignr ${addr wlan0}ESSID: $alignr ${wireless_essid wlan0}Connection quality: $alignr ${wireless_link_qual_perc wlan0}%Downloads:$alignr${downspeed wlan0}/s${downspeedgraph wlan0 10,300 F57900 FCAF3E}Total Downloads:$alignr${totaldown wlan0}Uploads:$alignr${upspeed wlan0}/s${upspeedgraph wlan0 10,300 F57900 FCAF3E}Total Uploads:$alignr${totalup wlan0}${else}${if_existing /proc/net/route eth1}$alignc ....Wireless....WAN IP:$alignr${execi 3600 wget -O- http://whatismyip.org/ | tail}IP address: $alignr ${addr eth1}ESSID: $alignr ${wireless_essid eth1}Connection quality: $alignr ${wireless_link_qual_perc eth1}%Downloads:$alignr${downspeed eth1}/s${downspeedgraph eth1 10,300 F57900 FCAF3E}Total Downloads:$alignr$${totaldown eth1}Uploads:$alignr${upspeed eth1}/s${upspeedgraph eth1 10,300 F57900 FCAF3E}Total Uploads:$alignr${totalup eth1}${else}${if_existing /proc/net/route eth0}$alignc ....Cable....WAN IP:$alignr${execi 3600 wget -O- http://whatismyip.org/ | tail}IP address: $alignr ${addr eth0}ESSID: $alignr ${wireless_essid eth0}Downloads:$alignr${downspeed eth0}/s${downspeedgraph eth1 10,300 F57900 FCAF3E}Total Downloads:$alignr${totaldown eth0}Uploads:$alignr${upspeed eth0}/s${upspeedgraph eth0 10,300 F57900 FCAF3E}Total Uploads:$alignr${totalup eth0}${else}Network Unavailable${endif}
Multiple Windows Conky

You can display multiple different Conky windows, simply create a new .conkyrc file and save it, for example as .conkyrc2, then run:
conky -c .conkyrc2 &If you want conky to run on start up ( no matter how many conky you got) simply creat a startup_sh config.
#!/bin/bash
sleep 9
conky -c .conkyrc &
conky -c .conkyrc2 &
conky -c .conkyrc3 &
conky -c .conkyrc4 &
conky -c .conkyrc5 &
conky -c .conkyrc6 &
And at command line field.
/bin/sh /home/username/.startconkymake sure you execute the file. Find the file , go to permision and tick the execute box.Enjoy Conky On StartUp.
Subscribe to:
Posts (Atom)