‘Super Boot Manager’ eases BURG, GRUB, Plymouth tweaking pains

Tweaking your GRUB bootloader to look pretty can often not only be confusing but leave you with a broken system should you get it wrong!
The newly launched ‘Super Boot Manager’ application, created by the developers behind graphical boot menu BURG, aims to streamline and simplify the process of tweaking boot ‘options’.
Super Boot manager is made up of three modules. Each one deals with a specific ‘boot’ function. You do not need to use all of them; if you want to tweak Plymouth alone simply use the ‘Plymouth’ module.
As with anything bootloader-related you are not advised to "mess" with GRUB unless you’re confident in what you’re doing and able to revert any changes.

GRUB Module

The GRUB module is capable of handling the most oft-used tasks, such as: -
  • One-click to re/install GRUB
  • Easy way to set the default boot OS
  • Change the GRUB screen resolution and menu time out
  • Remove old kernel/menu entries
  • Tweak text colours and set a background picture
  • Booting an .iso

buc_061-484x500-r80

Plymouth manager

The Plymouth module comes with some super helpful options. There is one-click enable/disabling of Plymouth itself, a gallery of alternative animated boot themes ready for easy download and, perhaps the jewel in the octopus-shaped crown, a one-click ‘proprietary driver’ fix that can help to turn a  garbled Plymouth boot under "official" drivers into something worth looking at.

buc_067-497x500-r80

BURG manager

Finally the option set many of you will be downloading the app for: the graphical bootloader BURG.
The BURG module in SBM comes with options not so dissimilar to that of GRUB, albeit with some added ‘visual’ goodness.
With one click can you install BURG itself to a hard drive of your choosing.
Set the default OS to boot into; set the screen resolution and timeout for the menu; easily install and enable  new themes (note that some may be considered inappropriate).
And the proverbial cherry-on-top comes in the form of a ‘BURG Removal’ button that wipes BURG away and reinstalls the traditional GRUB menu.
buc_069-485x500-r80

Download

Super Boot Manager is a free download and can be installed from a PPA, below, or manually downloaded and install  from sourceslist.eu.
The Super Boot Manager PPA provides packages for Ubuntu 10.04, 10.10 and 11.04.
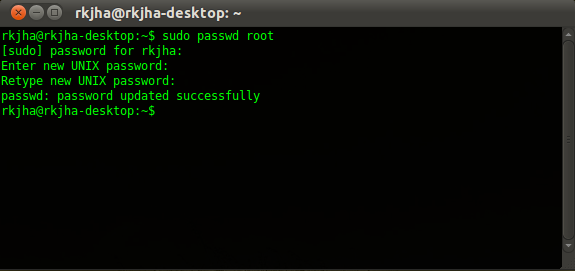
  • sudo add-apt-repository ppa:ingalex/super-boot-manager
  • sudo apt-get update && sudo apt-get install buc super-boot-manager
Once installed search ‘super boot’ in the Unity Dash or look for ‘Super Boot Manager’ under the ‘System’ menu.

Thanks to Jan B

i copy and paste this from OMGUbuntu UK for own reference.

Rotate Your GNOME/Xfce Wallpapers With DesktopNova


Every operating system is customizable to a certain extent.  Some, such as Linux, offer an incredibly wide variety of icons and themes, with others, like Mac OSX, not offering much at all.  One option all operating systems have, however, is the ability to change the desktop background picture, or wallpaper.  In this instance, Mac OSX shines, as it offers the ability to rotate through a folder full of images at preset intervals, so you’re never looking at the same image for longer than you want.

Linux and Windows, however, don’t offer this ability, at least not by default.  There are utilities available for both that have this feature, and in this article we’ll be talking about DesktopNova, a utility for Linux.

DesktopNova, as mentioned, doesn’t come installed by default (or at least not in Ubuntu or other popular distributions), but Debian and Ubuntu users will find it already in their software repositories. Other Linux distributions will need to check their package manager, or download the source code from this page.
In Ubuntu, the quickest way to install DesktopNova is from the Terminal.  So first, go to the Applications menu, then Accessories.

Open Terminal

Next, type the following command: sudo apt-get install desktopnova desktopnova-module-gnome desktopnova-tray

note: in the above command, installing desktopnova-module-gnome enables desktopnova for linux distributions running the gnome desktop.  there is also an xfce module, so xubuntu users should install desktopnova-module-xfce instead.  desktopnova will not run without one or the other being installed.
Once installed, you’ll find two DesktopNova entries in the same Accessories menu where you found the Terminal.

Open DesktopNova

To get started, open the first option, leaving DesktopNova-Tray alone (for now).
When you open DesktopNova, you’ll see a single window with four tabs.  The Images tab is first.

Select Images or Folder

Here is where you can create profiles (for different users, themes or occasions), as well as how you identify which images or folders will be used.
The second tab, called Settings, is just that.

Session Options

It offers the ability to set the wallpaper change interval, whether or not DesktopNova should change your wallpaper every time you launch it (even if the change interval isn’t complete), and whether DesktopNova should autostart with your computer.
Third is the Tray-Icon tab.

Tray Icon Options

There are only two options here: first is whether or not to start the DesktopNova-Tray application at launch (which allows you to change the wallpaper manually), and whether mouse scrolling through your wallpaper choices should be turned off or on.
Finally, the Advanced tab.

Image Type Filter

Here you can type in as many file extension types as you want.  The ones you have listed will be shown, those you leave out will be ignored.  So if you have duplicate images in your folder, some in PNG and others saved as JPG, you can have DesktopNova show only one or the other, so you don’t get repeats as often.
As mentioned, the DesktopNova-Tray application allows you to move forward or backward between images, just with a couple clicks (or a flick of the mouse wheel).

Tray Icon

You can also access the DesktopNova preferences, see the about screen, or quit the tray icon entirely. DesktopNova isn’t an incredibly complex program.  It basically mimics the desktop wallpaper slideshow ability already present in GNOME, but allows you to choose images from different locations, and without editing any XML files.  It’s simple, but useful, and that should make it a nice addition for most Linux users.

Enable Snow on ubuntu desktop using compiz fusion

This tutorial shows how to enable snow on your ubuntu desktop using compiz fusion plugin.It is tested in ubuntu 9.10(karmic).
First,make sure you have compiz installed and enabled 3D effect.You can click here for this information.
Download following plugin:
for amd64 user:
compiz-fusion-plugins-unsupported_083git20090911-1ubuntu1_amd64
for i386 user:
compiz-fusion-plugins-unsupported_083git20090911-1ubuntu1_i386
double click to install,or use this in terminal(Applications/Accessories/Terminal):

sudo dpkg -i package_name

Update:

Previous deb package might be old for your Ubuntu, here is how to compile and install the snow plugin from source code.
First, install the required packages:

sudo apt-get install build-essential git libtool
Then,use git command to download the source:
git clone git://anongit.compiz.org/fusion/plugins/snow
Navigate to the new created folder, and make and make install:
cd snow
make && make install

Now, open CCSM and you should the the “Snow” option in Extras.

Setting Up :

After this,open System->Preferences->CompizConfig-Settings-Manager.TickSnow in Extra tab.
snow
Now,press win(Windows super key)+F3 key combination and see effect!
snow1

Install CanonCaptDrv2.2 on ubuntu

These instructions will help get your LBPxxxx Canon Printer driver installed and automatically starting with monitor on:
  1. Ubuntu 11.04 - Natty
  2. Ubuntu 10.10 - Maverick
  3. Ubuntu 10.04 - Lucid
It also seems to work in unsupported (old) versions such as 9.10 (Karmic) and 9.04 (Jaunty)
For other canon printers see: HardwareSupportComponentsPrinters/CanonPrinters and its sub-articles but hopefully yours is in the list below.

Supported Printers Capt Driver v2.2


According to the official Canon driver documentation:
See extra notes after table where there are *'s.
Please update if your get an unlisted printer/ubuntu version working by going to the bottom the of the and finding the edit link at the very bottom of the screen (requires login)
Printer Name
PPD File Name
Verified, Ubuntu Releases

LBP9100C
CNCUPSLBP9100CCAPTK.ppd

LBP7200C series
CNCUPSLBP7200CCAPTK.ppd
    10.10/11.04

LBP7200Cdn (network mode)
CNCUPSLBP7200CCAPTK.ppd
    10.10/11.04

LBP6300
CNCUPSLBP6300CAPTK.ppd
    10.10

LBP6000 LBP6018
CNCUPSLBP6018CAPTK.ppd

LBP5300
CNCUPSLBP5300CAPTK.ppd

LBP5100
CNCUPSLBP5100CAPTK.ppd
    10.10

LBP5050 series
CNCUPSLBP5050CAPTK.ppd
   9.10/9.04

LBP5000
CNCUPSLBP5000CAPTK.ppd

LBP3500
CNCUPSLBP3500CAPTK.ppd

LBP3310
CNCUPSLBP3310CAPTK.ppd

LBP3300
CNCUPSLBP3300CAPTK.ppd

LBP3250
CNCUPSLBP3250CAPTK.ppd

LBP3210
CNCUPSLBP3210CAPTK.ppd

LBP3200
CNCUPSLBP3200CAPTK.ppd
    10.04

LBP3150 / LBP3108 / LBP3100
CNCUPSLBP3150CAPTK.ppd

LBP3100 / LBP3108 / LBP3150
CNCUPSLBP3150CAPTK.ppd
    10.10

LBP3010 / LBP3018 / LBP3050
CNCUPSLBP3050CAPTK.ppd
    11.04/10.10/10.04 /9.10/9.04

LBP3000
CNCUPSLBP3000CAPTK.ppd
    11.04

LBP2900
CNCUPSLBP2900CAPTK.ppd
    11.04/10.10/10.04/9.10/9.04

LBP-1210
CNCUPSLBP1210CAPTK.ppd
    10.10/10.04/9.10.9.04

LBP-1120
CNCUPSLBP1120CAPTK.ppd
    10.10/9.10.9.04

LBP-810**
CNCUPSLBP1120CAPTK.ppd
    11.04/10.10/10.04/9.10/9.04

** LBP-810 is not officially supported in version 2.2 of the Canon Driver

Package Repository


The Canon CAPT printer driver is split into two packages: cndrvcups-capt and cndrvcups-common available from the Canon printer driver PPA. As of May 2011, this PPA contains 2.20 version of the Canon drivers, build for i386 and amd64 on Lucid, Maverick and Natty. This is the easiest way to install the drivers.
To add the PPA to your system and install the packages do:
 
sudo add-apt-repository ppa:michael-gruz/canon
sudo apt-get update
sudo apt-get install cndrvcups-capt cndrvcups-common

how to login as root in Ubuntu 11.04

enable root in ubuntu 11.04


Enable (Unlock) root on Ubuntu 11.04

1 : Open Terminal/shell , (hit CTRL+ALT+T)
2 : Then, Type the command (Followed by your Login Password).
sudo passwd root
3 : when you will be prompted for “Enter the New Unix Password” Twice, Enter the root password.
4 : That’s All, To enjoy root power, logout from the current user session. At the login window, Enter ‘root’ as a username and the password, you entered in above step.
Conclusion : In root mode, don’t perform any action about which you aren’t sure, because a single mistake can cause a lot of damage. If you just want to browse files in root mode, then you can browse nautilus in root mode with one simple trick.

Browse Files in Root Mode with Nautilus

Open terminal and enter the command (of course, followed by your login password).
sudo nautilus

Find Us On Facebook

Related Posts Plugin for WordPress, Blogger... Linux Directory