Laptop Mode Tools is a laptop power saving package for Linux systems. It allows you to extend the battery life of your laptop, in several ways. It is the primary way to enable the Laptop Mode feature of the Linux kernel, which lets your hard drive spin down. In addition, it allows you to tweak a number of other power-related settings using a simple configuration file.
Ubuntu has a laptop-mode-tools package, which is installed by default on laptops. However, laptop mode is disabled by default in Ubuntu Edgy (6.10), because some people have been experiencing hangups with it on certain laptops (mostly Thinkpads). Until now, nobody has any clue what is happening here. To reenable laptop mode, edit /etc/default/acpi-support and set ENABLE_LAPTOP_MODE=true.
If you want to use the latest version of laptop mode tools, you can use the Debian packages, they are compatible enough to work out-of-the-box on Ubuntu. In fact, I would definitely advise using these packages -- the Ubuntu packages are crippled so that some options don’t work, the most notable of which are ENABLE_LAPTOP_MODE_ON_AC, ENABLE_LAPTOP_MODE_WHEN_LID_CLOSED and DISABLE_LAPTOP_MODE_ON_CRITICAL_BATTERY_LEVEL.
Install Laptop Mode Tools on ubuntu
Make sure you have a kernel that supports laptop mode. Any version starting from 2.6.6 should do, or any version that includes the file /proc/sys/vm/laptop_mode.
Now you need to download lastes version of .deb package from here
Once you have deb package you can install by double clicking on that or run the following command from your terminal
sudo dpkg -i laptop-mode-tools_1.47-1_all.deb
If everything went OK, laptop mode will be activated automatically the next time you unplug your laptop from the mains (except when you have an APM laptop). You can configure laptop mode tools using the config file, which is in /etc/laptop-mode/laptop-mode.conf. You can read more about the configuration options using
man laptop-mode.conf
Udev Discover - Tool for udev testers, coders, hackers and consumers
Udev discover aims for being a gnome-device-manager-like app using gudev instead of HAL, and to provide some fancy features for udev users and hackers.
Main features:
Browsing the sysfs tree via udev
Reports udev device info and udev properties
Filter and search devices
Monitorize udev device events
Install Udev Discover on ubuntu Natty
Open the terminal and run the following commnads

Main features:
Browsing the sysfs tree via udev
Reports udev device info and udev properties
Filter and search devices
Monitorize udev device events
Install Udev Discover on ubuntu Natty
Open the terminal and run the following commnads
sudo apt-add-repository ppa:fontanon/udev-discoverYou can run this application using the following command from your terminal
sudo apt-get update
sudo apt-get install udev-discover
udev-discoverScreenshot
New GNOME 3 Icon Theme By Tiheum: Faience
Tiheum, who is best known for the Faenza icon theme and Equinox GTK themes has started working on a new icon theme for GNOME 3 / GNOME Shell called "Faience". The theme is work in progress (this is the first public release) and it currently depends on the original Faenza for many icons, but it looks really promising and it already comes with 3 folder color variations.

(Faience Azur)

(Faience Ocre)
Faience icon theme is especially designed for GNOME Shell so it's not recommended to use it with Unity / GNOME 2.
Tiheum is also working on a GNOME Shell and GTK2/3 theme which will complete the "Faience" pack. The GTK2/3 theme is not yet available but you can already use the Faience GNOME Shell theme:

(Faience GNOME Shell theme and the original Faience folder icons)
Installation
Faience icon theme
To use Faience, you must firstly install the Faenza icon theme. If you run Ubuntu, you can install it from its official PPA using the commands below:
sudo add-apt-repository ppa:tiheum/equinox
sudo apt-get update
sudo apt-get install faenza-icon-theme
Alternatively, download Faenza icon theme from DeviantArt, extract the downloaded archive and copy it to the ~/.icons folder.
Faience is not yet available in the above PPA so to install it, download the archive and copy all the 3 folders (Faience, Faience-Azur and Faience-Ocre) to the ~/.icons directory (if this folder doesn't exist, create it), then use GNOME Tweak Tool to apply the icon theme:

Faience GNOME Shell theme
To use the Faeience GNOME Shell theme, download it from HERE, extract it to the ~/.themes folder and use GNOME Tweak Tool to apply it. If for whatever reason you don't want to use GNOME Tweak Tool (like... you can't install the user-theme extension which is required by this feature), just remove all the files under /usr/share/gnome-shell/theme and copy the Faience GNOME Shell theme files to this folder.
Download: Faience icon theme | Faience GNOME Shell theme
Written by in Webupd8
Search, View, Download & Convert YouTube Videos in Linux
If you’re a Linux user looking for a user-friendly, simple way to search for, view, download, and even convert videos from YouTube (and more), then a project called Gmediafinder might be just what you’ve been looking for.
YouTube is a great way to find user-submitted videos, but for some people, YouTube – and any website that uses Flash – isn’t an option, either because of their computer’s speed or simply because they don’t want to install Adobe Flash. Regardless, one of Gmediafinder’s advantages is that it does everything without using Flash.
Installing Gmediafinder is simple, for the most part. First, head over to the Gmediafinder entry at GTK-apps.
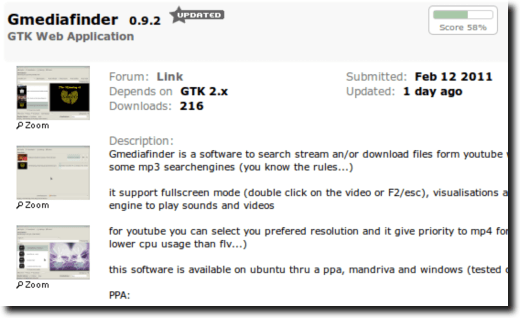
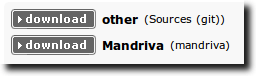
Read up on what it can do, and if it sounds like something you’d like to try out, scroll down to the download links. At the moment, you can download the source code or a package for Mandriva.
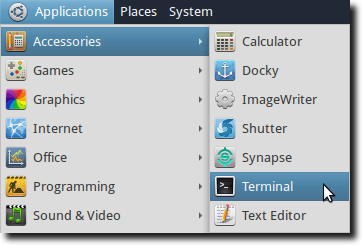
Ubuntu users also have the option of installing Gmediafinder via a personal package archive, which has the advantage of automatically installing prerequisites, as well as keeping your copy always up-to-date. To do this in Ubuntu, first open a Terminal.
Then type the following, which will add the Gmediafinder PPA to your software lists, update those lists, and then finally install Gmedia and any required libraries.
sudo apt-add-repository ppa:s-lagui/ppa && sudo apt-get update && sudo apt-get install gmediafinder.
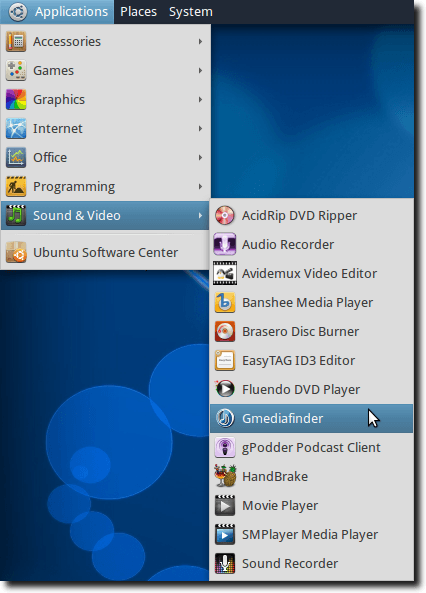
Once installed, you’ll find Gmediafinder in your Applications menu, under Sound & Video.
Gmediafinder has a nicely laid out interface, with obvious options that should be simple to figure out for most users.
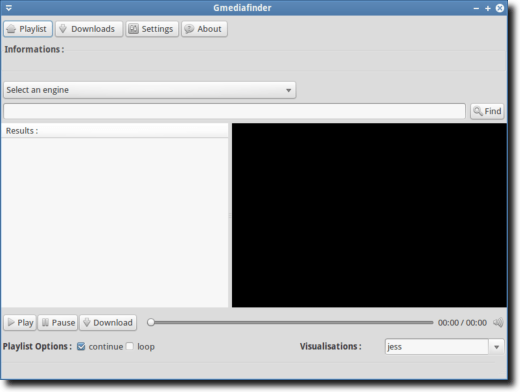
The top four buttons, labeled Playlist, Downloads, Settings and About are easy access buttons that take you to the Playlist screen (shown), to the Downloads interface (discussed below), to the Settings window or to the About screen.
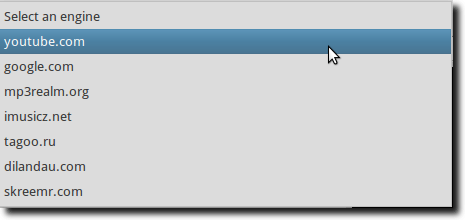
Below that is where you select the engine you want to search. As mentioned, Gmediafinder supports YouTube for videos, Google for basic searches, as well as a host of MP3 sites.
Once you’ve selected your search engine, enter what you want to find in the search box, and hit the Find button (or hit Enter on your keyboard). Here we’ve searched YouTube for “Phish” and are watching a video, right in the main window.
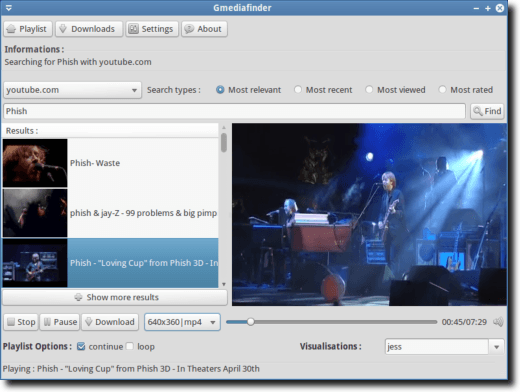
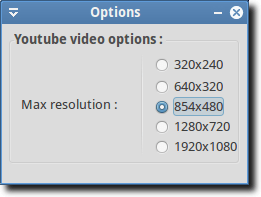
If we want, we can use the Playlist Options (at the bottom of the Playlist window), to either continue or loop through the playlist, for a neverending stream of videos (or music). And we can download using Gmediafinder as well. For MP3s, simply click the download button. YouTube videos can be downloaded in any of the supported sizes and formats; simply choose the one you want and click the download button.
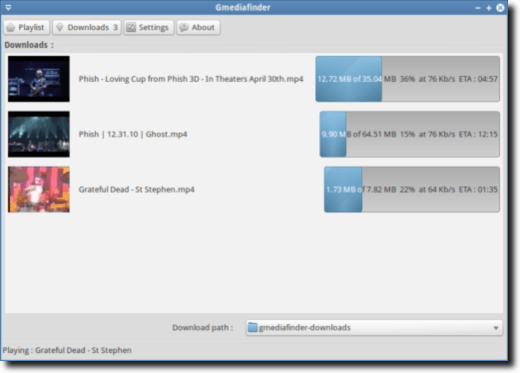
The built-in download manager is informative, but at the moment a little basic. For instance, there’s currently no way to pause, or even cancel downloads, without resorting to quitting the program altogether. And if you do quit the program in the middle of a download, that download is lost forever; you can’t restart Gmediafinder and pick up where you left off.
When a download is complete, you’ll see a few new buttons to the right of the progress field.
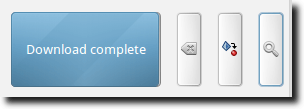
The first button is for deleting the entry from the download manager, the second – found only beside downloaded videos – is for converting the video’s audio to MP3, and the last is to view the file just downloaded. Converting to MP3 is a nice touch, as you may find a custom remix of a song you want to listen to, without viewing the video. The function works well, but at the moment you have no control over the quality of the conversion.
In fact, Gmediafinder is pretty much lacking in configuration options.
But don’t let the single YouTube option dissuade you from trying Gmediafinder. It’s fast, easy to use, and for searching, viewing/listening, downloading and converting, it’s a tough combination to beat.
Oil Rush : Ubuntu Download
Oil Rush From Unigine, the company that develops the cross-platform 3D engine for Linux, Mac, Windows, and PS3, comes a new RTS game called Oil Rush.
 In this fast-paced, real-time naval strategy game, you must not only out-drill your openents for oil, but also amass your army by capturing other platforms and subsequently defending them from invasion tower-defense style.
If you spend too much of your efforts pumping oil, your enemy will take over all the platforms in the sea and quickly destroy you; however, if you focus too intently on capturing other towers without spending time drilling and upgrading your arsenal, your enemy will capture all of the oil and leave you with no fuel for your forces.
The key is to think quickly, act quickly, and most importantly, form a balance of resource gathering and terrain acquisition.
Oil Rush is now available in the Ubuntu Software Center for Maverick/Natty i386/amd64 at the price of $19.95. While the game is still in development, you will receive instant access to the latest beta which is already quite polished. Please note that you will need a beefy video card, even at low settings, for an enjoyable experience with this game. For more details, please visit the Oil Rush website.
August 29, 2011:
Just another share OMG Ubuntu UK
Battle in the City
If you spend too much of your efforts pumping oil, your enemy will take over all the platforms in the sea and quickly destroy you; however, if you focus too intently on capturing other towers without spending time drilling and upgrading your arsenal, your enemy will capture all of the oil and leave you with no fuel for your forces.
The key is to think quickly, act quickly, and most importantly, form a balance of resource gathering and terrain acquisition.
Oil Rush is now available in the Ubuntu Software Center for Maverick/Natty i386/amd64 at the price of $19.95. While the game is still in development, you will receive instant access to the latest beta which is already quite polished. Please note that you will need a beefy video card, even at low settings, for an enjoyable experience with this game. For more details, please visit the Oil Rush website.
August 29, 2011:
Just another share OMG Ubuntu UK
Subscribe to:
Posts (Atom)