Install Synapse in Ubuntu 10.10


It’s finally arrived. After weeks of leaking screenshots and juicy tidbits on a ‘mystery new launcher’ we can reveal what it is.
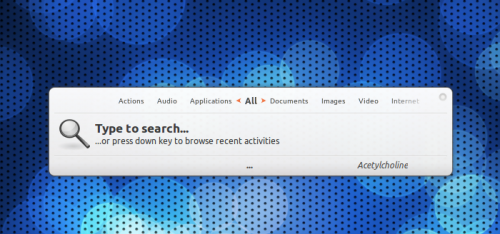
Called Synapse, the launcher is light, fast, zeitgeist powered and can do some incredible things thanks to tight Zeitgeist integration.
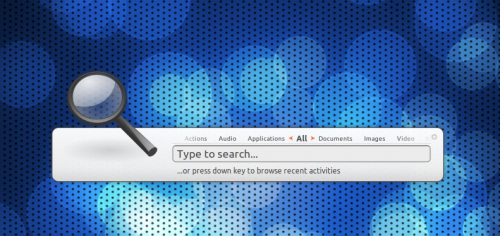
Synapse launcher in Ubuntu

Why Synapse?

The idea for Synapse was born from a merging of ‘Sezen’ – which allowed a way to search Zeitgeist log conveniently from your panel – and the more familiar GNOME Do. A visually slick n’ quick way to not only launch apps but also give an easy way to thumb through your Zeitgeist log.
If we were to slap a really 90′s style TV Commercial slogan on Synpase it’d be: “Find anything. Fast.”
What does Synapse do?
I’ll let Synapse developer mhr3 explain: -
“It well… searches stuff… If you ever used Gnome Do / Quicksilver / Gnome Launch Box, you’ll feel right at home with Synapse, if not, the only thing you need to do is run Synapse (or press Ctrl+Space to summon it), type what you’re looking for, and Synapse will present you a list of items that match your query.
Once you found the item you were looking for, you can perform an action on it (and these are defined by the plugins you’re using). If you don’t like the default action, just press Tab and search appropriate action.
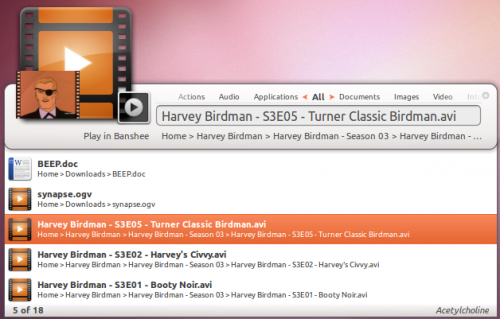
And besides this primary use-case, you can also browse recent items which were logged by Zeitgeist, in case you close a document by mistake or just want to hear again the music track that played a few minutes ago.”

Features

The default set of plugins shipped with Synapse are as follows: -
  • Applications – searches your desktop files
  • Banshee – allows you to play/enqueue music files in Banshee
  • Commands – runs any command (ie. “sudo apt-get update”)
  • Devhelp – search documentation using Devhelp
  • Dictionary – find definitions of words
  • Directory search – allows opening of commonly used directories
  • Gnome session – log out, shut down, restart
  • Hybrid search – complete Zeitgeist results by searching for similar files
  • Rhytmbox – play/enqueue music files in Rhythmbox
  • UPower – suspend & hibernate your computer
  • Zeitgeist – search anything logged by Zeitgeist
But thanks to the Zeitgeist integration pretty much any application can integrate with Synapse simply by integrating with Zeitgeist.

Download

Static screenshots don’t do Synapse justice, as the speed and lovely animations can only be witnessed in true fluid motion.
So why wait? Try it out right now.
  • sudo add-apt-repository ppa:synapse-core/ppa
  • sudo apt-get update && sudo apt-get install synapse
Once installed launch it from Applications > Accessories > Synapse

Usage

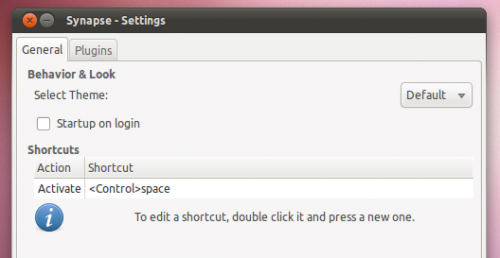
Just like GNOME Do and similar launchers Synapse is ‘called’ using the keyboard combination Ctrl + Space. If you have a different shortcut hardwired into your actual synapses you can change it to any combination you like via the settings menu.
Synapse Settings menu

Settings

As well as being the place to customize the keyboard combination for calling the launcher the settings menu also offers up a few extra choices such as whether it should start on login and what theme you’d prefer to use.
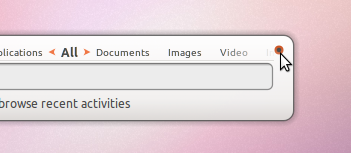
Can’t find the settings menu? Just hit the ‘pip’ on the upper-right hand side of the launcher.
Themes

There are four themes included by default.
Default
Dual
Mini
Virgillio
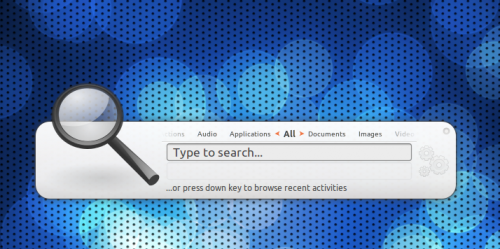
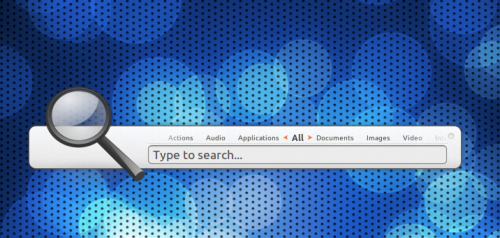
Which you use is entirely down to you: they all have plus points – Virgillio is the least ‘flashy’ and ‘mini’ is the most ‘bar’ like and default the least widest.

Install Google Earth 6 In Ubuntu / Linux [With Fixes]


For Ubuntu
1) Before proceeding, make sure you have the Multiverse repository added.

sudo apt-get install lsb-core
2) Install Google Earth package which will automatically create a Google Earth .deb


32bit:

sudo apt-get install googleearth-package
cd && make-googleearth-package --force
64bit:
sudo apt-get install googleearth-package ia32-libs
cd && make-googleearth-package --force

Monitor your computer with saidar on ubuntu system


saidar is a curses-based tool using libstatgrab library in order to gather information about your system state.


Among the displayed information, you will find networking interfaces state, mount points disk usage, disk read/write access, memory and swap usage as well as cpu and processes information.


saidar has been developped by the i-scream group, which also developped the libstatgrab library, in order to easily access information about your computer.


saidar is included in ubuntu dapper repository, therefore installation is quite simple:

sudo apt-get install saidar


Now that saidar is installed, you simply have to launch it from a terminal (console) by typing:

saidar


As you can see from the screenshot, you can easily get an overview of your system state as well as your hardware.


In this case, there is two network interfaces (eth0, eth1), two disks (hda and sda) and 8 mounted partitions.


saidar is a top like software which give you a pretty handy overview of your system.


Moreover, libstatgrab offers developpers an easy to use and powerfull library to watch the health of your system.

15 Linux Desktop Customizations

If you think Linux desktops are ugly, think again. Here is an awesome collection of 15 jaw dropping Linux desktop customizations made by users. I wouldn't mind calling them works of art instead of just customizations. They are that good. A good number of them include clever conky modifications. I haven't yet tried to emulate them in my desktop, but surely will, at least some of them. For now, just the screenshots and the source. Watch and enjoy!


Install Flock Web Browser Ubuntu 10.10


Flock is a free, open source web browser based on Firefox.
Flock is still in development and will be officially released and added to the Ubuntu repositories in future.
For those who want to try Flock before then, there are two methods, using either a pre-packaged .deb, or a compressed file be downloaded and installed manually. A .deb package file may be found at getdeb.net/flock and installed using any standard package installation method, or you download and extract the program using the following method:

Install Flock
  • Download Flock page for Linux.
  • Right click the file, choose Extract Here
  • Right click the desktop, choose Create Launcher  
    For command, click Browser and chose the file called 'flock' in the folder you just extracted. 

Amarok No Sound


Kubuntu 10.10 Maverick Meerkat comes with Amarok 2.3 pre-installed. For users of Kubuntu 10.04 Lucid Lynx, Amarok 2.3 will be among your normal updates.


Actually, in order to make it work, the package libxine1-ffmpeg is required, which probably isn't included in the default installation due to licensing issues. So, all you need to do is install the package and you are ready to amarok.
Libxine1-ffmpeg contains MPEG-related plugins used by libxine1, the media player library used by Xine engine, which Amarok and other xine-based players use. This package includes the ffmpeg plugin for Xine, enabling xine-based players a large variety of audio and video codecs.

sudo apt-get install libxine1-ffmpeg

Install Xine (if it is not there)

sudo apt-get install phonon-backend-xine
Then, GStreamer

sudo aptitude install phonon-backend-gstreamer
Then you must restart Amarok.

If Still No Sound,
Open Amarok --> Setting --> Configure Amarok --> Playback --> Configure Phonon ( choose device)

if still No Sound,
System --> Preference --> Sound --> Hardware --> setting for the selected device  (choose one)

Eyecandy Compiz Animations and Effects


Who doesn't like some eyecandy for their desktops, definitely not me. Compiz has enthralled Ubuntu users for years now. When GNOME officially ditched Compiz for Mutter for its next version, Ubuntu decided to stick with Compiz for its Unity Shell. Compiz is actively being developed now and we can expect a lot of surprises for next major Ubuntu release, Ubuntu 11.04 "Natty Narwhal". Here is a collection of Compiz experimental plugins that does not come with the default package and which is definitely going to blow you away.

compiz experimental plugins

  • Freely Transformable Windows gives you the ability to rotate, slant, flip, and grow or shrink windows by scaling them. Unlike resizing a window normally, a scaled window's contents grow and shrink along with the windows - text, buttons, and images inside the window will actually appear larger or smaller.
Stack Window Switcher compiz plugin
  • Stack Window Switcher is an absolutely eyecandy alternative to your normal Alt+Tab. If you are seeing it for first time, *big* surprise guaranteed.
Cube Atlantis
  • Cube Atlantis breaths in new "life" to desktop cube compiz plugin. Cube Atlantis plugin adds fish from the Atlantis screensaver to the inside of the cube. 
snow
  • Snow plugin makes snow fall on your desktop, simple as that.
Animations Add-On Compiz
  • Three new animations plugin. Animations Add-On, Animations Plus and Simple Animations. Brings in new animations life Helix, Blinds, Shatter etc.

  • Ghost plugin is awesome. Above screencast will give you the idea. There are a ton of other plugins too like Anaglyph, Minimize Effect, Fireflies, Stars, Elements etc. And you can install them all by doing the following.
How to Install Compiz Experimental Plugins in Ubuntu Maverick, Lucid?
  • After following the steps as given in the link above, goto System - Preferences - Compiz Config Settings Manager and you will find the new Compiz experimental plugins installed and ready to go

What To Do After A Fresh Ubuntu 10.10 Install? Run These Commands!

Important: before running the commands below, you need to enable the restricted, multiverse and partner repositories. To do this, open the Ubuntu Software Center, select Edit > Software Sources, and on the first tab (Ubuntu Software), check all the repositories. Then switch to the second tab (Other Software) and check the "Canonical Partners" repository.


1. Install Adobe Flash, Java, fonts, codecs and other restricted stuff (I don't use "ubuntu-restricted-extras" because it also installs some stuff I really don't need while it doesn't install a lot of the applications that I do need):

sudo apt-get install gstreamer0.10-ffmpeg gstreamer0.10-pitfdll gstreamer0.10-plugins-bad gstreamer0.10-plugins-bad-multiverse gstreamer0.10-plugins-ugly gstreamer0.10-plugins-ugly-multiverse gstreamer0.10-plugins-base gstreamer0.10-plugins-good libdvdnav4 libdvdread4 libmp4v2-0 libxine1-ffmpeg ffmpeg flashplugin-nonfree sun-java6-fonts rar unrar p7zip-full p7zip-rar unace unp zip unzip ttf-mscorefonts-installer ttf-liberation mencoder mplayer sun-java6-plugin sun-java6-jre
2. Medibuntu is not ready for Maverick yet, but you can still play encrypted DVDs. Simply run the following command:

sudo /usr/share/doc/libdvdread4/install-css.sh

3. If you occasionally build applications from source or make your own deb files, here are some basic packages you should install:

sudo apt-get install build-essential automake make checkinstall dpatch patchutils autotools-dev debhelper quilt fakeroot xutils lintian cmake dh-make libtool autoconf git git-core subversion bzr

4. The following applications should really be default in Ubuntu but anyway, install VLC, OpenShot, GIMP (removed from the default installation a few releases back), gThumb, Pidgin, Skype, Adobe Air, Wine (ok, these last 2 shouldn't be in a default install), aptitude (removed from the default installation starting with Maverick) and Chromium using the following command:

sudo apt-get install vlc mozilla-plugin-vlc openshot gimp gthumb pidgin skype adobeair wine aptitude chromium-browser

Disclaimer / notes: This is just the basic stuff to install after a fresh Ubuntu 10.10 Maverick Meerkat installation and it includes a lot of non-free / restricted applications as well as some very popular non-default applications. If you'd find some applications which you've never heard of, it wouldn't be a "what to do immediately after installing ubuntu" post anymore but a regular post about new applications with a catchy title.

'My Weather Indicator': A New Ubuntu Weather Appindicator

The new indicator-datetime (clock indicator) which was released in Ubuntu 10.10 Netbook Edition (and will also be default in 11.04 Desktop edition too) doesn't provide any weather info like the old Gnome Clock applet.


To add the PPA and install My Weather Indicator in Ubuntu Lucid, Maverick or Natty, use the following commands

sudo add-apt-repository ppa:lorenzo-carbonell/atareao
sudo apt-get update
sudo apt-get install my-weather-indicator                                                                                                                                              
Once installed, run it by going to Accessories > My Weather Indicator.

Find Us On Facebook

Related Posts Plugin for WordPress, Blogger... Linux Directory