Showing posts with label applications. Show all posts

Install LibreOffice 3.3 Ubuntu


The first stable release of the free office suite ‘LibreOffice’ is now available for download.
Forked from OpenOffice late last year, LibreOffice 3.3 provides users with the familiar set of applications – albeit with greatly improved features such as: -
  • Import and work with SVG files
  • Easy way to format title pages and their numbering in Writer
  • Improved Navigator Tool for Writer
  • Improved ergonomics in Calc for sheet and cell management
  • Microsoft Works and Lotus Word Pro document import filters.
A detailed breakdown of new features in LibreOffice 3.3 can be found @libreoffice.org/download/new-features-and-fixes

Download LibreOffice

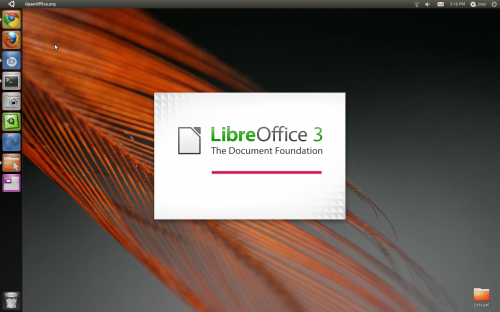
Enough with the chit chat how do you get a-hold of it? LibreOffice 3.3 can be downloaded in .deb format from libreoffice.org or, for Ubuntu 10.10 users, installed from the LibreOffice PPA using the following commands: -
sudo add-apt-repository ppa:libreoffice/ppa
sudo apt-get update && sudo apt-get install libreoffice
Ubuntu 11.04 testers will already have LibreOffice installed as it undergoes evaluation for as OpenOffice’s replacement.
Add a main menu to Docky


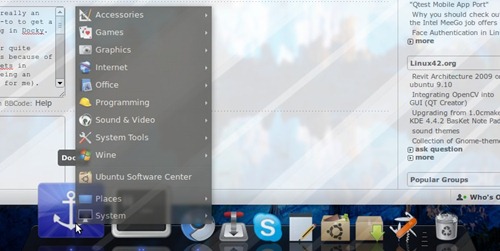
Long for a ‘main menu’ on Docky?
138187-Screenshot
"I’ve been using AWN for quite sometime now, but that’s because of the lack of many docklets in Docky; the main-menu being an important one (at least for me)" he says on why he sought out a solution.
"What we do is change the "click" function of the Docky icon. So I modified that a bit, and got it to display the gnome-menu whenever I click the Docky icon."
Sounds neat, so how does one do it?
  1. Install "xdotool" (click here to install)
  2. Press ALT+F2 and type in "gconf-editor".
  3. Press enter.
  4. Navigate to /apps/docky-2/Docky/Items/DockyItem and double click on "DockyItemCommand"
  5. In the "value" field copy paste: xdotool key -clearmodifiers alt+F1
  6. Press OK and close the box.
  7. Click on the Docky icon

The Easiest Way To Try Ubuntu or Linux - Lili For Windows


With the release of Ubuntu 11.04 Alpha 2 many of you will be grabbing the nearest USB stick available and taking the Narwhal for a whirl.
If you’re a dual booter using Windows then try out LiLi – a free, open-source windows-based Linux Live USB creator.

Why LiLi?

LiLi is a simple, straightforward and intuitive application to use; perfect for Windows users looking to try out Linux but not wanting to waste physical media or install directly to hard disk.
Feature list time: -
  • Built-in virtualization feature lets you run your Linux USB in Windows – no reboot necessary
  • Easy slider and checkbox let you set persistence levels to store data
  • Option to hide ‘Linux’ files to keep your key clean
  • Automatic ISO integrity check
  • Works with .IMG files

But doesn’t Ubuntu/UNetbootin do this?

Regardless of your preferred tool it’s always nice to be aware of choices and Linux Live USB is a great one at that.
From personal experience I can attest to LiLi saving my butt so many times.
Where other ‘USB disc creators’ have produced hit and miss results – sometimes the resulting USB has worked fine, other times it’s taken multiple goes to get a USB capable of booting past the familiar name of ‘H. Peter Anvin’ – LiLi has always worked.

Download

LiLi can be nabbed from the official site @ linuxliveusb.com/en/download.
A new Beta release is also available adding: -
  • Auto-detecting the latest SysLinux bootloader
  • Persistence for Debian 6.X
  • Download folder for Linux distros can be set
  • Install-Only flag for Linux distros without Live mode
  • Free space calculation is more accurate
This can be download @ linuxliveusb.com/en/more-downloads

Send And Recieve SMS Messages With My Computer

AndroidPC

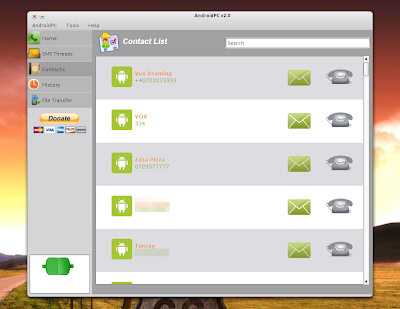
AndroidPC is a free Android application that lets you send and receive SMS messages (and notifies you when you receive new SMS messages through a popup), pickup or deny calls, send/receive files and urls, synchronize contacts with avatars and more - all from your computer. For now the application only works through WiFi. The computer part runs on Linux, Windows and Mac.


AndroidPC PC part
(The AndroidPC computer dashboard)

Even though the idea is great, AndroidPC has a few quirks: if you receive an SMS and you don't see the notification, the notification area icon doesn't change so you have to open the dashboard to see it. Also, it doesn't display notifications for calls but you can see these in the history, along with the received SMS messages. What I didn't test is the call feature so I'm not sure how that works.

AndroidPC send sms


Installation and usage


Download the Android part via the Android Store (that's a link to the new web store) and the PC part from HERE. Please note that you need JRE to install the PC part.

To use it, open the Android app, then on your computer right click the AndroidPC icon in your notification area, select "Open Dashboard" and here select "Connect to Android". The first time you you'll need to syncronize your Android device with your PC - to do this, click the "Synchronize" icon on your phone or go to or select AndroidPC > Synchronize on the AndroidPC dashboard on your computer. If you have trouble setting everything up, the Android PC website has a full how-to on this.

To add the application to startup in Linux, go to System > Preferences > Startup Applications, add a new startup program and under "Command" enter "javaws /path/to/androidpc.jnlp" (replace /path/to with the path to where you've downloaded androidpc.jnlp).

INSTALL DOCKY STACK UBUNTU

Docky Stacks screenshot

"Stacks" is a really cool way of browsing files from Docky. This feature is available in a separate Docky branch but luckily Ricotz has packaged and uploaded it to his Docky PPA (available for Ubuntu 10.10 Maverick Meerkat and 11.04 Natty Narwhal).


Thanks to the PPA, installing Docky Stacks is easy, but it involves some extra steps if you're using the Docky development PPA or the Elementary Art / Desktop PPAs because the Docky stacks version is older then the Docky development branch (but newer then the latest stable Docky):

A. If you're using the Docky Development PPA, use the following commands to purge the PPA:
sudo apt-get install ppa-purge
sudo ppa-purge ppa:docky-core/ppa

B. If you're using the Elementary Art or Elementary Desktop PPAs added (this does not include the Nautilus Elementary PPA!), you need to disable them temporarily. To do this, go to Software Sources (you can access this via the Ubuntu Software Center menu) and disable them. Then, remove Docky:
sudo apt-get remove docky

Once you've completed the steps above (or if you didn't have any of those PPAs added), simply copy/paste the following commands in a terminal to install Docky Stacks:
sudo add-apt-repository ppa:zeitgeist-sharp/daily
sudo add-apt-repository ppa:ricotz/docky
sudo apt-get update
sudo apt-get install docky

The Zeitgeist-sharp PPA above is only used for some dependencies which are not available in the Ricotz Docky PPA (libdbus-glib1.0-cil and libdbus1.0-cil).

Alternatively, you can download the Docky with Stacks .deb files from the PPA and manually install them. Doing so, you won't have to remove/purge any PPA but if you do this make sure you don't upgrade Docky from other PPAs as you'll lose the "stacks" feature. Also, downloading the .deb files instead of adding the PPA means you won't get any Docky Stacks updates so adding the PPA is recommended.

Faenza-styled gaming icons


Created by popular Deviant Artist half-left, 22 game icons are currently included. These range from fun-favorites like Super Tux Kart and Frozen Bubble to survival horror game Amnesia: Dark descent and ‘hard-to-describe-in-a-single-sentence’ puzzle game ‘Minecraft.
Use of the pack requires the Faenza icon set to be installed (PPA instructions here).
Download and further install instructions to be found @ half-left.deviantart.com/art/Faenza-Game-Icons

Find Us On Facebook

Related Posts Plugin for WordPress, Blogger... Linux Directory