Make Ubuntu distribution updates faster

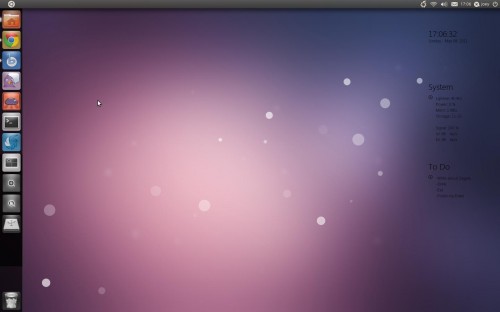
Ubuntu 11.04 has just been released and if like me you're getting errors "Cannot download release notes" this is because the servers will be overloaded.
To make your download faster and put less pressure on the update servers open Update Manager, click "Settings", click the first tab "Ubuntu Software", select "Other" in the "Download From" box then click the "Best Server" button, this will choose the fastest server. The more users that do this the more the load is spread and quicker updates will be.


source : http://blog.rwky.net

Hex-a-hop

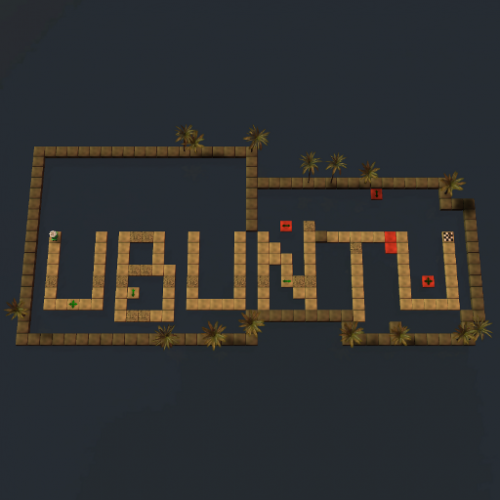
Hex-a-hop is a simple yet fun little puzzle game where you take a little girl hopping across tiles in efforts to destroy all the green tiles on the board. The beige tiles on the board are permanent and cannot be destroyed, but once you have stepped on a green tile, it will disintegrate as soon as you step on to another tile.
There are exactly 100 levels which obviously increase in difficulty as you progress through the game. After defeating a level, one or more levels are unlocked to allow you to progress on your tile smashing journey. If you are having particular difficulty on a certain level, you can usually choose a different path of progression, but if you want to beat the game, you’ll eventually have to return to face your nemesis again. There are no time limits or goals, so map things out, take your time, and dominate.


Hex-a-hop
Hex-a-hop
It’s free; it’s simple; it’s fun. Download it now!

Brukkon

In keeping with the puzzle theme, I thought I’d offer a bonus Download of the Week for those of you who have 7 bones to burn. Similar to Hex-a-hop, Brukkon is a puzzle game where you must navigate a grid to reach the finish line, or in this case, finish tile.
Instead of a little girl hopping around though, you command a rolling robot across 35 unique levels including a bonus level exclusive to the Ubuntu Software Center which is featured in the screenshot below.
Unlike Hex-a-hop, Brukkon is more involved and provides features such as movable bridges, different weather conditions, and disappearing tiles.  The game also provides two different camera angles for you to view the entire board and map out your strategy.

Brukkon
 Brukkon and Ubuntu FTW!
Unfortunately, apt-urls are not available for paid items in the Ubuntu Software Center yet, so you’ll need to fire up Ubuntu Software Center manually to purchase and install it.  Brukkon is available on both Maverick and Natty.  For $7, it’s quite the steal.
all credit to Brian Thomason,

The Clockwork Man

The Ubuntu Software Center has been filling up with new games recently, and I’d like to highlight another one of those this week.
Meet ‘The Clockwork Man’.
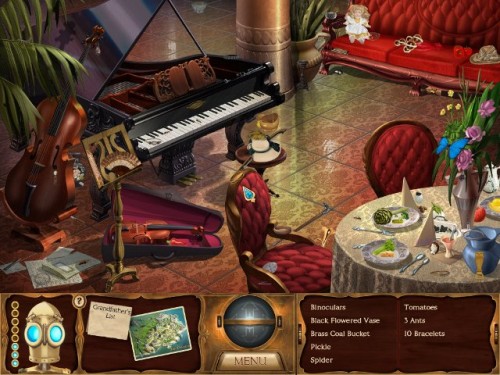
The Clockwork Man is an artistic, hidden object game set in the Victorian Era with a strong Steampunk vibe.


The Clockwork Man - Hidden Object Game

Hidden Object Game

In The Clockwork Man, you travel the world searching for the parts necessary to construct the world’s greatest invention.  To reach this goal, however, you must first find collections of items to gain information from in-game characters, fix devices, or solve puzzles to journey on.
If you run into trouble finding a particular piece of a collection, don’t worry, your faithful sidekick Sprocket will help.  Use him wisely though, as he must recharge from time to time.
The artwork in the game is amazing, and it is easy to get lost in it;  The game boast literally hundreds of hand-painted items.  The background music used is also soothing and very well done, which is a pleasant surprise not found in many Linux offerings.
The Clockwork Man is available in both Ubuntu Maverick and Natty for $14.99USD. For more information, you may visit the game’s official site

all credit to Brian Thomason,

Trash Indicator for Ubuntu

Ever felt that emptying the trash can in Ubuntu required too many clicks or too much effort?
If so you might be lazy, but the following Trash Can indicator might just prove more in keeping with your workflow…


Trash indicator shows how many items are currently in the trash can, along with a menu item to quickly ‘empty’ the trash, too.
The developer of the applet, Michael J, told us: -
“I’ve never been fond of the big desktop trash icons or one taking up space in a dock, so I have tucked the trash into a nice and tidy indicator. Kind of surprised no-one else has done this already.”

Download

An easy-to-install .DEB package of Trash Indicator can be downloaded on the official project home @ code.google.com/p/trashindicator/

The applet works with Ubuntu 10.04, 10.10 and Ubuntu 11.04.
And all credit to Joey Sneddon,

Enable DVD Playback in Ubuntu 11.04

Playback of DVDs in Ubuntu 11.04 is not enabled out of the box. Thankfully setting it up takes no time at all.
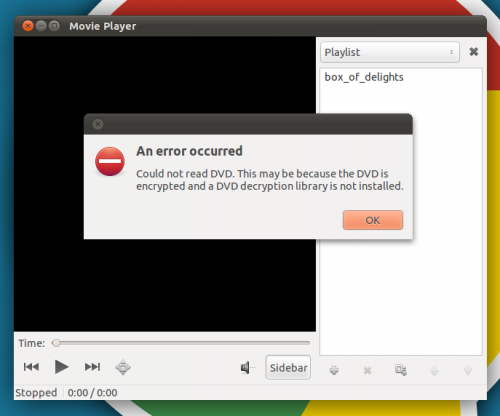
Have you enabled it? If not you can find out by inserting a DVD into your disc drive/slot and choosing to ‘Play’ it with Ubuntu’s default media player. The following error will greet you: -


Ways to enable DVD playback in Ubuntu

Fluendo

Enabling DVD playback in Ubuntu is simple enough, and there are various ways to do it. Some might say the easiest – as well as the most legally unquestionable- is to purchase the Fluendo DVD Playback software from the Ubuntu Software Centre.

Libdvdcss

If you’d prefer to spend the Fluendo costs on physical DVDs rather than DVD software, you can enable DVD playback in your faovurite application by installing a package called ‘libdvdcss’.
‘libdvdcss’ is a small library file that accesses DVDs “…like a block device, without having to bother about the decryption.”
Hit the buttons below to download a .DEB package of libdvdcss from the medibuntu repositories.
Download libdvdcss for Ubuntu 11.04
Download libdvdcss for Ubuntu 11.04 64bit
Once the .deb file has downloaded just double-click on it to begin installation.
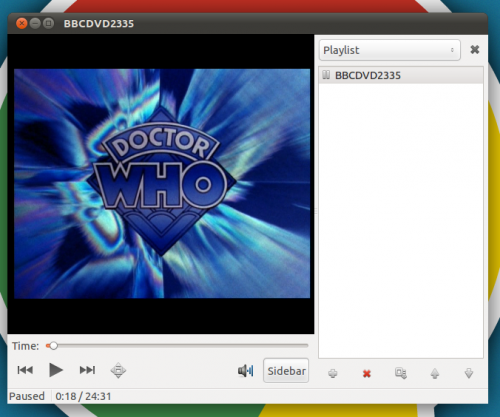
After installation has finished you can open your favourite media player and DVD playback will be supported.


the credit goes to..

Turn The Google Menu Bar Into An Ubuntu-themed Panel

Google began rolling out a darker menu bar across its sites and services yesterday.
This minor similarity has led one developer to create a userstyle that replaces Google’s choice of menu bar with an Ubuntu Ambiance-themed ‘Panel’ style – even through to the highlight colour used in menus


Download

The userstyle is available to download from gnome-look.org.
Once fully download head to your Downloads folder and extract the .zip archive.
Next open your ‘Home’ folder and press ‘CTRL+H’ to reveal hidden files and folders.
Google Chrome/ium users need to move the css file to:
  • ~/.config/chromium/Default/User StyleSheets/
Firefox users need to move the css file to:
  • ~/.mozilla/firefox/yourProfile/chrome/

Going Further in Chrome

For an even greater Ambiance-themed Chrome you can also install: -
The credit goes to...

Neverputt

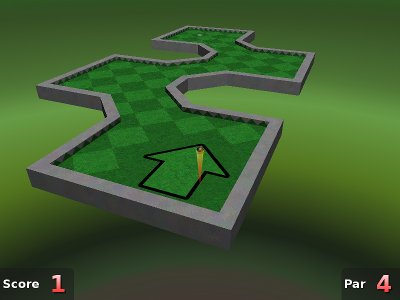
Neverputt is a 3D miniature golf game for 1-4 players.  You are in the first-person hot-seat and must control the direction and velocity of the ball in order to be successful.


Neverputt

Neverputt

Whether you’d like to just relax and play a little putt-putt in peace, or challenge yourself with a bizarre combination of holes, Neverputt will not disappoint.  It ships with seven different courses by default, ranging from easy to insanely difficult.
Many of the holes are similar to those you would see at a real miniature golf course, but some of the more complex holes provide pitfalls such as moving tiles and teleportation.
Neverputt is free software available for all currently supported versions of Ubuntu. For more information, please visit the project’s website on icculus. Please note that most of the information you find there will pertain to Neverputt’s better known big brother, Neverball


How-To Remove Old Kernel Entries From GRUB [Video]

As you may know, some people find Linux to be really challenging when they first try it out.
Because of this, I have launched a new segment called: “Ubuntu is Easy” and thought the OMG! Ubuntu! community – in the true nature of open source – could also assist Ubuntu newbies in finding their way around this great operating system.
In this tutorial I show you how to get rid of all of those extra boot menu entries that the system updater adds. These aren’t just menu entries, they’re actually different versions of the kernel, the core of a Linux operating system, so they take up space on your hard drive.
Watch to find out how to fix this problem, the easy way.


What topics do you think new users would find difficult?

Feel free to reply below, or write me on my Twitter or Facebook!

A Surprisingly Easy Tip for Upgrading Ubuntu

Some versions of Ubuntu don’t automatically give you the option to upgrade to the latest version. In this week’s Ubuntu is Easy segment, I show you the easy way to upgrade Ubuntu to the latest release, which as of when this video was released is 11.04, Natty Narwhal!
Thanks for all your previous feedback with my last video! I came up with “Ubuntu is Easy” to help new Ubuntu users get more familiar with their new Linux operating system and see that you don’t have to be an expert with the command line to get things done.
Video produced on Linux Mint 10 using Kdenlive, Audacity, and GIMP.


Do you find the GUI works just as well as the CLI for upgrading?

Feel free to reply below, or write me on my Twitter or Facebook!

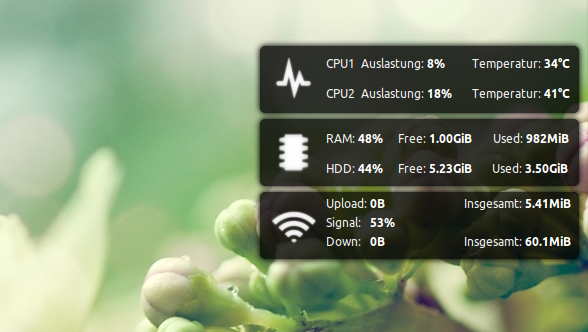
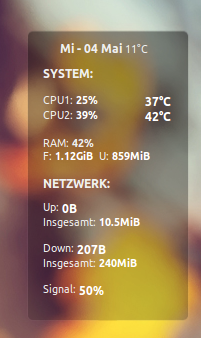
Five beautifully simple Conky themes

The desktop system monitor that comes with an intimidating learning curve is capable of producing some stunning, flashy and crazy looking desktops.
Its equally adept at doing understated too, as this selection of five ‘simple’ Conky themes shows.
All you need to add them to your desktop is the ‘Conky’ package from the Software Centre. This can be installed in Ubuntu by hitting the button below.
click to install conky in Ubuntu
To install, pick your favourite, download it, then extract it tour home folder, then run ‘Conky’ to see it on your desktop.
To tweak any of the theme – for example to change font sizes or screen position – you’ll need to edit the ‘.conkyrc’ file in your home folder.

Zegoe


image

Cowon Clock


image

Notify OSD Conky


image

Gotham


image

ConkyBarli


image


Yes I do not qualify for credit
By Joey Sneddon, Published May 12, 2011 in OMG Ubuntu

GNOME Shell Workspace Indicator Extension

Gnome Shell Workspace Indicator

Here is yet another new GNOME Shell extension which I'm sure you'll find very useful: Workspace Indicator. The extension works in the same way as Indicator-Workspaces for Gnome 2: it displays your your current workspace number on the panel and lets you switch to a different workspace.

The extension has another "hidden" but interesting feature: it changes the workspace on scroll over the Workspace Indicator.

To install it, firstly install git-core. In Ubuntu, run this:


sudo apt-get install git-core
Then, to install Workspace Indicator GNOME Shell extension, run the following commands:

cd && git clone https://github.com/erick2red/shell-extensions.git
cd shell-extensions
mkdir -p ~/.local/share/gnome-shell/extensions #just in case
mv workspace-indicator@erick.red.gmail.com/ ~/.local/share/gnome-shell/extensions/


Update: Erick (the Workspace switcher Shell extension developer) has changed how the extension works so now you must compile it to be able to install it. To make things easier, I've archived a working Workspace Indicator so you can download it from HERE - to install it, extract it to ~/.local/share/gnome-shell/extensions/ (make sure the Workspace Indicator GNOME Shell extension folder is called "workspace-indicator@erick.red.gmail.com").

Then reload Gnome Shell.

Note: I've only tested the extension using the latest GNOME Shell from GIT and GNOME Shell 3.0.1 under Fedora 15.

Written by in Web Upd8

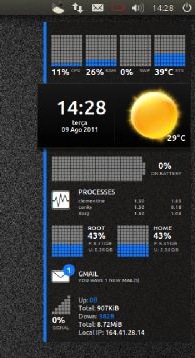
‘Conky Colors’ 7.0

User-friendly Conky setup Conky Colors has added a new ‘stylish lightening stats‘ mode as part of its 7.0 release. 


“SLS” mode provides CPU and system process usage, weather conditions, GMail alerts, HDD usage, battery, and network statistics.
Other modes included with Conky Colors, but not new to this release, are ‘Rings’, ‘Board’, ‘Default’, ‘Slim’, and ‘Cairo’.
Also making up the 7.0 release are three new “themes” (the colours used for the various modes), script changes and general stability improvements.

Download

Download link and full instructions on setting up Conky Colors can be found at the author of Conky Color’s Deviant Art page @ helmuthdu.deviantart.com
To save some time on the first step, all you need to install can be done by clicking the button below: -


Skype Ubuntu Messaging Menu / NotifyOSD Integration

Skype Notifications Ubuntu


There's a very old thread @ Ubuntuforums which includes a python script to get NotifyOSD notifications for Skype. Since the first post, the python script has been improved by many users and it now provides both Ubuntu Messaging Menu integration (with all the features the Messaging Menu provides like the envelope icon changing color when you have a pending notification, etc.) as well as NotifyOSD notifications for Skype.

Using the script on Ubuntu Forums involves manual setup and the instructions are pretty clear but there are quite a few steps to follow. Also, the thread doesn't provide info on what dependencies you may need to install to get it working. So I've made a script which sets up most of the stuff automatically, however you still have to add a command in the Skype options manually to get it to work.

If you prefer to do this the manual way, download the improved Skype Notify by not_insane from UbuntuForums and follow the instructions inside. For an somewhat automated way, follow the instructions below.


Get Messaging Menu / NotifyOSD integration for Skype in Ubuntu 11.04 or 10.10


Before continuing, please note that I've only tested this with Ubuntu 11.04 Natty Narwhal 32bit (with Unity) as well as Ubuntu 10.10 32bit and it worked but it probably won't work with other Ubuntu versions! Also, I cannot guarantee this will work - if it doesn't (and it doesn't involve my installation script), you can ask for support @ Ubuntuforums.


1. Running the following commands, you'll download my script which will automatically set up everything (mostly). So open a terminal and copy/paste the commands below:

wget http://webupd8.googlecode.com/files/skype-notify-messaging
chmod +x skype-notify-messaging
./skype-notify-messaging

The script will now ask what you want to do. Enter 1 to install Skype notifications / Messaging Menu support or 2 to remove it:

Skype script


2. Now you must set up Skype - this only requires 3 clicks and a command you must copy/paste in the Skype options.

Open Skype, log in and in its options (click the Skype logo on the bottom left corner of the Skype window and select "Options), under "Notifications" click "Advanced View":

Skype Options notifications


Then check the "Execute the following script on any event" box and under it, paste this:

python /usr/share/skype-notify-improved/skype-notify.py -e"%type" -n"%sname" -f"%fname" -p"%fpath" -m"%smessage" -s%fsize -u%sskype

Here's a screenshot:

Skype options notifications


Then click "Apply".


3. Now log out from Ubuntu, log back in and start Skype from the Messaging Menu (envelope icon), not from some other place like Dash, etc! Oh, one more thing: you won't get any notifications if your status is set to Do Not Disturb.


4. Authorizing the scripts with Skype.


The first time you'll receive a notification (like for instance when someone writes something to you and the window is minimized: then you'll get the popup to authorize the scripts), a window will pop up asking for permission to use the Skype API:

Skype authorization

Here, check the "Remember this selection" box, then "Yes" and you're ready!


5. Optional:  since Skype now shows up in the Ubuntu Messaging Menu, you may want to blacklist it from showing up on the notification area (Ubuntu 11.04). To do this, install dconf-tools:
sudo apt-get install dconf-tools

Then press ALT + F2 and enter: "dconf-editor", navigate to desktop > unity > panel and under "systray-whitelist", remove skype but leave the rest of applications.


Removing the Skype Messaging Menu / NotifyOSD integration


Ubuntu 11.04+ only: If you want to remove the Skype Messaging Menu integration, run the script again (step 1 in this post) and this time enter "2" when prompted instead of "1".

Then once again go to Skype options, under "Notifications" click "Advanced View" and uncheck the Execute the following script on any event box.


Credits for the Skype Messaging Menu / NotifyOSD integration go to Lightbreeze, Ned Hoy, not_insane and everybody else who contributed to this.
 
Written by in Web Upd8

Nord: A Beautiful Glassy GNOME Shell Theme

Nord is a new glassy GNOME Shell theme based on Zukitwo, created by WebUpd8 reader rAX.

The theme is currently in beta and there are some known bugs but it already looks great, featuring some unique elements like the switches which look amazing (see the screenshots). If you use GNOME Shell, you must really give it a try!


Here are a few screenshots:

Nord GNOME Shell theme

Nord GNOME Shell theme

Nord GNOME Shell theme

Nord GNOME Shell theme


To use Nord, either extract it in the ~/.themes/ folder and use GNOME Tweak Tool or ThemeSelector GNOME Shell extension to apply the theme or rename the extracted folder from "gnome-shell" to "theme" and replace the /usr/share/gnome-shell/theme folder.

Download Nord GNOME Shell theme

Written by in Web Upd8

Conky Lunatico Rings

Conky Lunatico Rings is a really nice Conky configuration based on Conky Orange which displays rings for the CPU, memory, disk and network usage, in the form of gauges.


You can download Conky Lunatico Rings from HERE.


Because there were some spacing issues on my system, I've tweaked the configuration a bit so it looks like this:

Conky Lunatico Rings
(Using the original configuration, it looks like this on my system)


But maybe the original Conky Lunatico Rings works better on your computer (it's most probably related to the font configuration) so try the original firstly. If you want my tweaked version, you can get it from HERE


Because the wireless ring is useless for me, I've removed it - so if you don't want the wireless part and don't know how to do it, you can download my modified Conky Lunatico Rings without wireless from HERE. Here's a screenshot with this config:

Conky Lunatico Rings


But you can of course tweak it some more by yourself, it's really not that difficult.


Usage


Firstly, install Conky. In Ubuntu, use the following command in a terminal:
sudo apt-get install conky

To use Conky Lunatico Rings, you'll need to install the Ubuntu font - this is already available on your system if you use Ubuntu 10.10+ or you can manually download it from font.ubuntu.com.

Then, download Conky Lunatico Rings (links above), extract the downloaded archive, create a folder called ".conky" in your home directory and move the "conky_lunatico.lua" and "conkyrc_lunatico" files into this folder.

And finally, run it using the following command:
conky -c ~/.conky/conkyrc_lunatico


To add Conky Lunatico Rings to startup, open Startup Applications, under "Name" enter "conky" and under "Command", enter this:
conky -p 50 -c /home/YOUR_USERNAME/.conky/conkyrc_lunatico

Where "YOUR_USERNAME" is yes, your username :) This will delay the Conky startup which is required for it to function properly.


For more Conky configurations, check out our Conky tag.

Written by in Web Upd8

DoudouLinux 1.0

DoudouLinux

DoudouLinux is a Linux distribution for children, designed to be both educational and fun. It can be used from a CD/DVD or an USB stick so you don't have to install it. We've reviewed it a while back so check out that post for more info.


The first stable DoudouLinux version was released earlier this month. DoudouLinux 1.0 "Gondwana" is based on Debian Lenny and supports 15 languages, using 5 different alphabets. Here are the most important changes in DoudouLinux 1.0:
  • three new applications: Songwrite (a simple song editor and player which defaults to use fingerings and tabs instead of the musical notation), Stopmotion (animation movie creator - using this app, you can make videos from a series of photos in which the characters are slightly moved from one shot to another) and Jukebox (a small launcher that plays the music files in the user’s Music directory)
  • new startup / shutdown graphics and music
  • songs for children
  • better hardware support, especially for networking and wifi (Network Manager has replaced lxnm)


Songwrite and Stopmotion aren't exactly for young children, but there are quite a few applications for children of any age, like: Tux Paint, Piano Keyboard, Childsplay and lots more.

Doudoulinux

Doudoulinux

Doudoulinux


DoudouLinux 1.0 is the last release based on Debian Lenny and the next version will use Debian Squeeze as a base and will be ported to the ARM platform.

Written by in Web Upd8

Get Rid Of PPA "404 Not Found" Messages When Running "apt-get update"

PPA 404 errors

If you type the wrong PPA address when adding a PPA or you add a PPA that doesn't provide packages for your Ubuntu version, you'll get a "404 Not Found" error message when running "apt-get update".

These errors are pretty much harmless (though they probably slow down "apt-get update" a bit) but if you want to get rid of them anyway, you must disable the PPAs that cause the 404 errors via Software Sources. If you want an easier, automated way to disable the PPAs that cause these errors, give "fix404" a try.

"fix404" is a simple script that checks for "404 not found" messages for all the PPAs added to your software sources and prompts you to disable them:

Fix404 PPA errors

"fix404" will prompt twice for each PPA - that's because it needs to disable both the binary and the source line.


By the way, if you want to check which Ubuntu versions are supported by each PPA you've added, use "checklp".


Installation


The "fix404" PPA is only available for Ubuntu 11.04 Natty Narwhal - add it and install it using the commands below:
sudo apt-add-repository ppa:lkjoel/fix404
sudo apt-get update
sudo apt-get install fix404

For other Ubuntu versions, you can download the .deb file from HERE.

To use "fix404", run the following command in a terminal:
sudo fix404

Update: the last command is required because I've found a bug in this script (the permission of the modified .list files is changed). I've reported the bug so hopefully it will be fixed. The bug has been fixed. In case you've ran fix404 before the fix and get an Update Manager error, run this command in a terminal: "sudo chmod 644 /etc/apt/sources.list.d/*".


Also see: Launchpad-Getkeys, a tool to automatically import all missing PPA GPG keys.


Thanks to lkubuntu for the script!
 
Written by in Web Upd8http://www.webupd8.org/2011/07/get-rid-of-ppa-404-not-found-messages.html#more

5 Beautiful Plank Themes

Plank is new dock for Linux written in Vala, developed by the Docky team.

1. Glass Pill:


Glass Pill Plank theme


2. Ubuntu Panel:

Plank Ubuntu Panel theme


3. HUD:

Plank HUD theme


4. Froyo:

Plank Froyo theme


5. Rounded Glass:

Plank Rounded Glass theme


Usage


To install Plank in Ubuntu, use the commands below (this will add the Plank/Docky testing PPA):
sudo add-apt-repository ppa:ricotz/docky
sudo apt-get update
sudo apt-get install plank

The above PPA is available for Ubuntu Oneiric, Natty and Maverick.


To use a theme, make a backup of the original Plank theme under ~/.config/plank/theme/ and then extract the downloaded theme into this folder (~/.config/plank/theme/), replacing the already existing files. Note: ~/.config/ is a hidden folder in your home directory so press CTRL + H to see it.


Themes thanks to Cassidy James; via elementaryositdev

Written by in Web Upd8

Android App To Send And Receive Text Messages Via Gmail Or GTalk: DesktopSMS

DesktopSMS is an Android application that forwards SMS messages from your phone to GMail or Google Talk. You can even reply to these text messages, either using Gmail or using your favourite IM client (it needs to support Google Talk).

DesktopSMS


While replying to text messages via Gmail is as easy as replying to an email, using DesktopSMS with Google Talk makes it a bit annoying because you have to add each contact that texts you to your Gtalk. Also, when someone sends an SMS for the first time, Google Talk displays a pop-up to add that person as a friend, but the initial SMS is not displayed.


DesktopSMS was created by the ROM Manger developer and is currently in beta. In my initial test, there was a delay when replying to text messages via Gmail, but this didn't happen in a later test. Still, this is currently in beta so you may encounter delays or other bugs, so use DesktopSMS at your own risk.


Download DesktopSMS


Thanks to Matt for the tip!
Written by in Wep Upd8

Facebook Notifier With Ubuntu Messaging Menu Integration: FBuntu

Fbuntu

FBuntu is an application that integrates Facebook into the Ubuntu Messaging Menu and displays NotifyOSD notifications for each new Facebook notification you receive.


The application is a bit difficult to set up but I've tried to make it easier so all you have to do is copy/paste a few commands:


1. Install BZR and get FBuntu using the commands below:
sudo apt-get install bzr
cd
bzr branch lp:fbuntu


2. Click THIS link to authorize FBuntu with Facebook. After authorizing the application, copy the link to which it redirects and paste it into the url="" field (it's on line 24) in the auth.py.example file (you'll find it in the fbuntu folder in your home directory).

3. Use the commands below to copy the facebook.png file into the ~/.icons folder, rename auth.py.example to auth.py and run Fbuntu:
cd
mkdir -p ~/.icons
cp fbuntu/facebook.png ~/.icons/
mv fbuntu/auth.py.example fbuntu/auth.py
python ~/fbuntu/fbuntu.py

The last command above should start FBuntu.

For enabling inbox notifications, see the README file. In my test, I got a lot of notifications after enabling this so it may be better to leave this off.


If you want to report a bug or contribute code, you can find FBuntu @ Launchpad.

Thanks to Greg for the tip!
Written by in Web Upd8

Complete List of Ubuntu Unity Shortcut keys & Mouse Tricks

Super Key(Windows Key) - Opens dash.
Hold Super Key - Invokes Launcher.
Hold Super Key and hit 1, 2, 3 etc - Open an Application from Launcher. When you hold the Super Key, specific numbers will be displayed in order above each application.
Alt + F1 - Put keyboard focus on the Launcher, use arrow keys to navigate, Enter launches the application, Right arrow exposes the quicklists if an application has them.
Alt + F2 - Opens dash in special mode to run any commands.
Super + A - Opens up application window from launcher.
Super + F - Opens up files and folders window from launcher. Both these shortcuts can be viewed by simply holding the Super Key as well.
Super + W - Spread mode, zoom out on all windows in all workspaces.
Super + D - Minimize all windows(acts as Show Desktop). Hitting it again restores them.
Super + T - Opens trash can.
Super + S - Expo mode (for everything), zooms out on all the workspaces and let's you manage windows.
Ctrl + Alt + T - Launch Terminal.
Ctrl + Alt + L - Lock Screen.
Ctrl + Alt + Left/Right/Up/Down - Move to new workspace.
Ctrl + Alt + Shift + Left/Right/Up/Down - Place window to a new workspace.
F10 - Open the first menu on top panel, use arrows keys to browse across the menus.

Mouse Shortcuts/Tricks for Ubuntu Unity

  • Clicking and holding an icon and then dragging it around will allow you to reorder it on the launcher. You can also drag it off to the right of the launcher to move it around. Note that you need to make an explicit movement to the right to move the icon off the launcher before you can move it around.
  • Dragging and Dropping an icon into the trash can will remove it from the Launcher.
  • Moving and holding the cursor on the left side for a few seconds will launch Unity dock.
  • Moving the cursor to top-left corner(near Ubuntu icon) will launch Unity dock as well.
  • Scrolling the mouse wheel while over the Launcher scrolls the icons if you have too many and need to move around quickly.
  • By Scrolling the mouse wheel while over the Sound icon on top panel helps you increase or decrease system volume.
  • Middle click on an application's launcher icon - Open a new instance of the application in a new window. Very useful at times. In laptops with touchpads, hitting left/right click buttons together is akin to middle click.
  • Maximizing - Dragging a window to the top panel will maximize it.
  • Restore/Unmaximize - Dragging the top panel down OR double clicking on the top panel will do.
  • Tiling - Dragging a Window to the left/right border will auto tile it to that side of the screen. One of the highlights of new Unity experience.
And Some Useful Window Management Shortcuts

Alt + F10 - Toggle between Maximize/Unmaximize current window.
Alt + F9 - Minimize current window.
Alt + Tab - Toggle between currently open windows.
Alt + F4 - Closes current window.
Alt + F7 - Moves the current window(both keyboard and mouse can be used)

28 Beautiful HD Wallpapers You`ve Seen On WebUpd8


1. ".56"

Wallpaper 56


2. (no name)

Wallpaper


3. (no name)

Wallpaper


4. Aqua Pro

Wallpaper Aqua Pro


5. Calm

Wallpaper Calm


6. Hole

Hole Wallpaper


7. Order

Wallpaper order


8. Rotatory

Rotatory wallpaper


9. Solid

Solid wallpaper


10. Ubuntu Clear

Ubuntu clear wallpaper


11. Striped

Striped Wallpaper


12. Serenity

Serenity


13. Mirrored

Wallpaper room mirrored


14. Embraced

Wallpaper space abstract


15. When It Falls

Wallpaper When It Falls


16. Woodism


17. Meerkats in the sun

Wallpaper Ubuntu meerkats in the sun


18. Abstraction Wave

Wallpaper abstraction wave


19. Stadium Doors

Stadium Doors


20. Surface I Wallpaper

Wallpaper Surface I


21. Sunset

Sunset Wallpaper


22. Snow Blind

Snow Blind Wallpaper


23. Road

Road wallpaper


24. Persistence Wallpaper

Wallpaper Persistence green


25. Green Mist

Wallpaper Green Mist


26. ".28"

.28 wallpaper flowers


27. Mystical Forest Path

Wallpaper Blue Forest mystical forest path


28. Whirl

Wallpaper Whirl


Written by in Web Upd8

Find Us On Facebook

Related Posts Plugin for WordPress, Blogger... Linux Directory