Showing posts with label applications. Show all posts

Install BBC iPlayer Desktop get Live Radio/Live TV in Ubuntu

BBC iPlayer Desktop is an application allows downloading and playing BBC programs on your computer so that you can watch them when you are not connected to the internet.

This is cross plat-form program from BBC official site, it works on Windows XP/Vista/7, Mac, and Linux.

Installation:

Click the install button and follow the on screen prompts on following page:


Now try out the new BBC iPlayer Desktop and enjoy your favourite BBC programmes!


wibom Wine Bottle Management

Application called Wine bottle management (or wibom) is used to (as its name suggests) manage so-called Wine bottles.


Wine is the program for running applications for Microsoft Windows on other operating systems, primary on GNU/Linux. This program creates in the user’s home directory a folder called .wine containing user preferences, the simplified version of Windows registers and files structure of simulated disk C:. Many Wine users don’t know there can be more those folders coexisting. They are called bottles. Because of bottles it is possible to have a few isolated instances of “Pseudowindows” on one system.


Wine offers no system for managing those folders. It is needed to have a basic knowledge of using Bash or any other system shell and knowledge of principles of Wine’s job to be able to use bottles. And this is business of wibom.
Wine bottles can be easily managed, they could be created, cloned. Windows software can be easily installed into them. Everything is possible through easy GTK interface.


Screenshot


Download

Debian / Ubuntu

There is a repository for Debian, Ubuntu and their derivates. Here is the APT line:

deb http://wibom.sourceforge.net/debian ./ #Wibom
 
In case, you don’t know what to do with that line, just follow the how-to. After adding the repository and updating the list of repositories, install wibom-debian or wibom-ubuntu package as usual. The repository is unsigned, if you want help us with a signed one, contact us.

openSUSE / SUSE Linux Enterprise

There is a repository for openSUSE 11.4 (thanks to Michal Hrušecký). You can add it as root by command:

zypper ar http://download.opensuse.org/repositories/home:/hroncok/openSUSE_11.4/ "wibom"
 
Than you can install wibomwibom-gtk and wibom-bottle-chooser packages as usual. There are also repositores for 11.3 and Factory. As well as for SLE 11 and it’s SP1.

Mandriva Linux

There is a repository for Mandriva Linux (thanks to Peťoš). You can add it as root by command:

urpmi.addmedia --update wibom http://petos.cz/mandriva/wibom
 
Than you can install wibomwibom-gtk and wibom-bottle-chooser packages as usual.

Fedora

There is a repository for Fedora 15 and 14. You can add it by saving the following file as /etc/yum.repos.d/wibom.repo.

[wibom]
name=Wine bottle management
baseurl=http://download.opensuse.org/repositories/home:/hroncok/Fedora_15/
enabled=1
gpgcheck=0
Than you can install wibom, wibom-gtk and wibom-bottle-chooser packages as usual. Don’t forget to change Fedora_15 to Fedora_14 if using Fedora 14.

Other Linux distributions

Get the tarball and unpack it to your root directory. You’ll need a few dependencies to run Wibom. Here’s the list of Debian packages, they would probably have very similar names in your distribution (packages in brackets are optional):

wine bash trash-cli ruby libgettext-ruby1.8 libgtk2-ruby1.8 hicolor-icon-theme (xdg-utils zenity winetricks wget python-minimal)

Other UNIXes

We would appreciate any help with making packages for OpenSolaris or *BSD.

Screenshot :


Trash Indicator for Ubuntu

Ever felt that emptying the trash can in Ubuntu required too many clicks or too much effort?
If so you might be lazy, but the following Trash Can indicator might just prove more in keeping with your workflow…


Trash indicator shows how many items are currently in the trash can, along with a menu item to quickly ‘empty’ the trash, too.
The developer of the applet, Michael J, told us: -
“I’ve never been fond of the big desktop trash icons or one taking up space in a dock, so I have tucked the trash into a nice and tidy indicator. Kind of surprised no-one else has done this already.”

Download

An easy-to-install .DEB package of Trash Indicator can be downloaded on the official project home @ code.google.com/p/trashindicator/

The applet works with Ubuntu 10.04, 10.10 and Ubuntu 11.04.
And all credit to Joey Sneddon,

Turn The Google Menu Bar Into An Ubuntu-themed Panel

Google began rolling out a darker menu bar across its sites and services yesterday.
This minor similarity has led one developer to create a userstyle that replaces Google’s choice of menu bar with an Ubuntu Ambiance-themed ‘Panel’ style – even through to the highlight colour used in menus


Download

The userstyle is available to download from gnome-look.org.
Once fully download head to your Downloads folder and extract the .zip archive.
Next open your ‘Home’ folder and press ‘CTRL+H’ to reveal hidden files and folders.
Google Chrome/ium users need to move the css file to:
  • ~/.config/chromium/Default/User StyleSheets/
Firefox users need to move the css file to:
  • ~/.mozilla/firefox/yourProfile/chrome/

Going Further in Chrome

For an even greater Ambiance-themed Chrome you can also install: -
The credit goes to...

GNOME Shell Workspace Indicator Extension

Gnome Shell Workspace Indicator

Here is yet another new GNOME Shell extension which I'm sure you'll find very useful: Workspace Indicator. The extension works in the same way as Indicator-Workspaces for Gnome 2: it displays your your current workspace number on the panel and lets you switch to a different workspace.

The extension has another "hidden" but interesting feature: it changes the workspace on scroll over the Workspace Indicator.

To install it, firstly install git-core. In Ubuntu, run this:


sudo apt-get install git-core
Then, to install Workspace Indicator GNOME Shell extension, run the following commands:

cd && git clone https://github.com/erick2red/shell-extensions.git
cd shell-extensions
mkdir -p ~/.local/share/gnome-shell/extensions #just in case
mv workspace-indicator@erick.red.gmail.com/ ~/.local/share/gnome-shell/extensions/


Update: Erick (the Workspace switcher Shell extension developer) has changed how the extension works so now you must compile it to be able to install it. To make things easier, I've archived a working Workspace Indicator so you can download it from HERE - to install it, extract it to ~/.local/share/gnome-shell/extensions/ (make sure the Workspace Indicator GNOME Shell extension folder is called "workspace-indicator@erick.red.gmail.com").

Then reload Gnome Shell.

Note: I've only tested the extension using the latest GNOME Shell from GIT and GNOME Shell 3.0.1 under Fedora 15.

Written by in Web Upd8

Skype Ubuntu Messaging Menu / NotifyOSD Integration

Skype Notifications Ubuntu


There's a very old thread @ Ubuntuforums which includes a python script to get NotifyOSD notifications for Skype. Since the first post, the python script has been improved by many users and it now provides both Ubuntu Messaging Menu integration (with all the features the Messaging Menu provides like the envelope icon changing color when you have a pending notification, etc.) as well as NotifyOSD notifications for Skype.

Using the script on Ubuntu Forums involves manual setup and the instructions are pretty clear but there are quite a few steps to follow. Also, the thread doesn't provide info on what dependencies you may need to install to get it working. So I've made a script which sets up most of the stuff automatically, however you still have to add a command in the Skype options manually to get it to work.

If you prefer to do this the manual way, download the improved Skype Notify by not_insane from UbuntuForums and follow the instructions inside. For an somewhat automated way, follow the instructions below.


Get Messaging Menu / NotifyOSD integration for Skype in Ubuntu 11.04 or 10.10


Before continuing, please note that I've only tested this with Ubuntu 11.04 Natty Narwhal 32bit (with Unity) as well as Ubuntu 10.10 32bit and it worked but it probably won't work with other Ubuntu versions! Also, I cannot guarantee this will work - if it doesn't (and it doesn't involve my installation script), you can ask for support @ Ubuntuforums.


1. Running the following commands, you'll download my script which will automatically set up everything (mostly). So open a terminal and copy/paste the commands below:

wget http://webupd8.googlecode.com/files/skype-notify-messaging
chmod +x skype-notify-messaging
./skype-notify-messaging

The script will now ask what you want to do. Enter 1 to install Skype notifications / Messaging Menu support or 2 to remove it:

Skype script


2. Now you must set up Skype - this only requires 3 clicks and a command you must copy/paste in the Skype options.

Open Skype, log in and in its options (click the Skype logo on the bottom left corner of the Skype window and select "Options), under "Notifications" click "Advanced View":

Skype Options notifications


Then check the "Execute the following script on any event" box and under it, paste this:

python /usr/share/skype-notify-improved/skype-notify.py -e"%type" -n"%sname" -f"%fname" -p"%fpath" -m"%smessage" -s%fsize -u%sskype

Here's a screenshot:

Skype options notifications


Then click "Apply".


3. Now log out from Ubuntu, log back in and start Skype from the Messaging Menu (envelope icon), not from some other place like Dash, etc! Oh, one more thing: you won't get any notifications if your status is set to Do Not Disturb.


4. Authorizing the scripts with Skype.


The first time you'll receive a notification (like for instance when someone writes something to you and the window is minimized: then you'll get the popup to authorize the scripts), a window will pop up asking for permission to use the Skype API:

Skype authorization

Here, check the "Remember this selection" box, then "Yes" and you're ready!


5. Optional:  since Skype now shows up in the Ubuntu Messaging Menu, you may want to blacklist it from showing up on the notification area (Ubuntu 11.04). To do this, install dconf-tools:
sudo apt-get install dconf-tools

Then press ALT + F2 and enter: "dconf-editor", navigate to desktop > unity > panel and under "systray-whitelist", remove skype but leave the rest of applications.


Removing the Skype Messaging Menu / NotifyOSD integration


Ubuntu 11.04+ only: If you want to remove the Skype Messaging Menu integration, run the script again (step 1 in this post) and this time enter "2" when prompted instead of "1".

Then once again go to Skype options, under "Notifications" click "Advanced View" and uncheck the Execute the following script on any event box.


Credits for the Skype Messaging Menu / NotifyOSD integration go to Lightbreeze, Ned Hoy, not_insane and everybody else who contributed to this.
 
Written by in Web Upd8

Android App To Send And Receive Text Messages Via Gmail Or GTalk: DesktopSMS

DesktopSMS is an Android application that forwards SMS messages from your phone to GMail or Google Talk. You can even reply to these text messages, either using Gmail or using your favourite IM client (it needs to support Google Talk).

DesktopSMS


While replying to text messages via Gmail is as easy as replying to an email, using DesktopSMS with Google Talk makes it a bit annoying because you have to add each contact that texts you to your Gtalk. Also, when someone sends an SMS for the first time, Google Talk displays a pop-up to add that person as a friend, but the initial SMS is not displayed.


DesktopSMS was created by the ROM Manger developer and is currently in beta. In my initial test, there was a delay when replying to text messages via Gmail, but this didn't happen in a later test. Still, this is currently in beta so you may encounter delays or other bugs, so use DesktopSMS at your own risk.


Download DesktopSMS


Thanks to Matt for the tip!
Written by in Wep Upd8

Facebook Notifier With Ubuntu Messaging Menu Integration: FBuntu

Fbuntu

FBuntu is an application that integrates Facebook into the Ubuntu Messaging Menu and displays NotifyOSD notifications for each new Facebook notification you receive.


The application is a bit difficult to set up but I've tried to make it easier so all you have to do is copy/paste a few commands:


1. Install BZR and get FBuntu using the commands below:
sudo apt-get install bzr
cd
bzr branch lp:fbuntu


2. Click THIS link to authorize FBuntu with Facebook. After authorizing the application, copy the link to which it redirects and paste it into the url="" field (it's on line 24) in the auth.py.example file (you'll find it in the fbuntu folder in your home directory).

3. Use the commands below to copy the facebook.png file into the ~/.icons folder, rename auth.py.example to auth.py and run Fbuntu:
cd
mkdir -p ~/.icons
cp fbuntu/facebook.png ~/.icons/
mv fbuntu/auth.py.example fbuntu/auth.py
python ~/fbuntu/fbuntu.py

The last command above should start FBuntu.

For enabling inbox notifications, see the README file. In my test, I got a lot of notifications after enabling this so it may be better to leave this off.


If you want to report a bug or contribute code, you can find FBuntu @ Launchpad.

Thanks to Greg for the tip!
Written by in Web Upd8

Laptop Mode Tools - Laptop power saving package for Linux systems

Laptop Mode Tools is a laptop power saving package for Linux systems. It allows you to extend the battery life of your laptop, in several ways. It is the primary way to enable the Laptop Mode feature of the Linux kernel, which lets your hard drive spin down. In addition, it allows you to tweak a number of other power-related settings using a simple configuration file.

Ubuntu has a laptop-mode-tools package, which is installed by default on laptops. However, laptop mode is disabled by default in Ubuntu Edgy (6.10), because some people have been experiencing hangups with it on certain laptops (mostly Thinkpads). Until now, nobody has any clue what is happening here. To reenable laptop mode, edit /etc/default/acpi-support and set ENABLE_LAPTOP_MODE=true.

If you want to use the latest version of laptop mode tools, you can use the Debian packages, they are compatible enough to work out-of-the-box on Ubuntu. In fact, I would definitely advise using these packages -- the Ubuntu packages are crippled so that some options don’t work, the most notable of which are ENABLE_LAPTOP_MODE_ON_AC, ENABLE_LAPTOP_MODE_WHEN_LID_CLOSED and DISABLE_LAPTOP_MODE_ON_CRITICAL_BATTERY_LEVEL.

Install Laptop Mode Tools on ubuntu
Make sure you have a kernel that supports laptop mode. Any version starting from 2.6.6 should do, or any version that includes the file /proc/sys/vm/laptop_mode.
Now you need to download lastes version of .deb package from here
Once you have deb package you can install by double clicking on that or run the following command from your terminal

sudo dpkg -i laptop-mode-tools_1.47-1_all.deb

If everything went OK, laptop mode will be activated automatically the next time you unplug your laptop from the mains (except when you have an APM laptop). You can configure laptop mode tools using the config file, which is in /etc/laptop-mode/laptop-mode.conf. You can read more about the configuration options using
man laptop-mode.conf

Udev Discover - Tool for udev testers, coders, hackers and consumers

Udev discover aims for being a gnome-device-manager-like app using gudev instead of HAL, and to provide some fancy features for udev users and hackers.

Main features:
Browsing the sysfs tree via udev
Reports udev device info and udev properties
Filter and search devices
Monitorize udev device events

Install Udev Discover on ubuntu Natty
Open the terminal and run the following commnads
sudo apt-add-repository ppa:fontanon/udev-discover
sudo apt-get update
sudo apt-get install udev-discover
You can run this application using the following command from your terminal
udev-discover
Screenshot

Search, View, Download & Convert YouTube Videos in Linux


If you’re a Linux user looking for a user-friendly, simple way to search for, view, download, and even convert videos from YouTube (and more), then a project called Gmediafinder might be just what you’ve been looking for.
YouTube is a great way to find user-submitted videos, but for some people, YouTube – and any website that uses Flash – isn’t an option, either because of their computer’s speed or simply because they don’t want to install Adobe Flash.  Regardless, one of Gmediafinder’s advantages is that it does everything without using Flash.
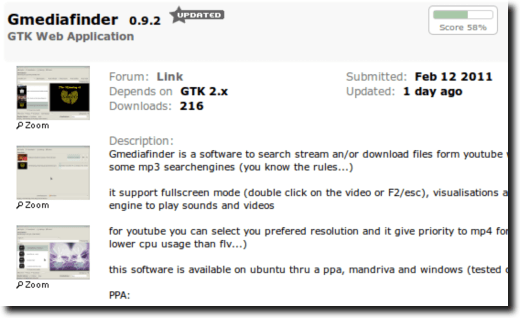
Installing Gmediafinder is simple, for the most part.  First, head over to the Gmediafinder entry at GTK-apps.

Gmediafinder GTK Apps Page

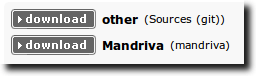
Read up on what it can do, and if it sounds like something you’d like to try out, scroll down to the download links.  At the moment, you can download the source code or a package for Mandriva.

Download Options

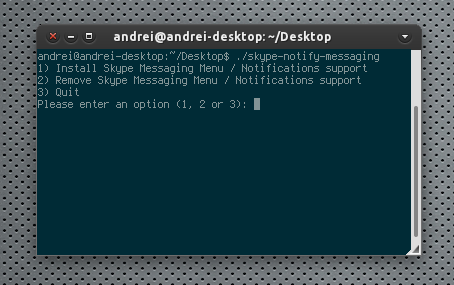
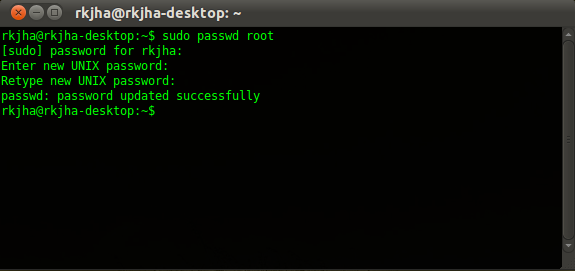
Ubuntu users also have the option of installing Gmediafinder via a personal package archive, which has the advantage of automatically installing prerequisites, as well as keeping your copy always up-to-date.  To do this in Ubuntu, first open a Terminal.

Open Terminal

Then type the following, which will add the Gmediafinder PPA to your software lists, update those lists, and then finally install Gmedia and any required libraries.
sudo apt-add-repository ppa:s-lagui/ppa && sudo apt-get update && sudo apt-get install gmediafinder. 
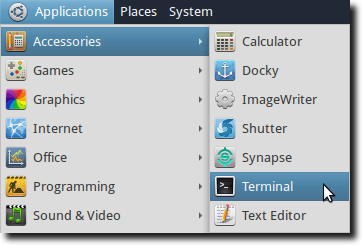
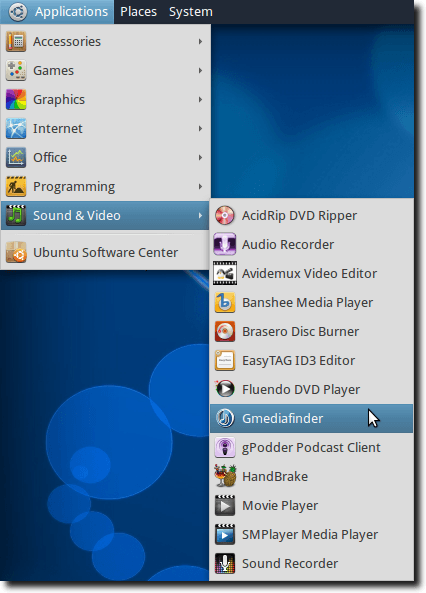
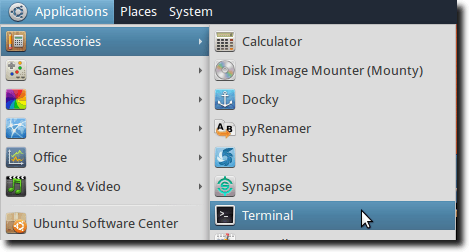
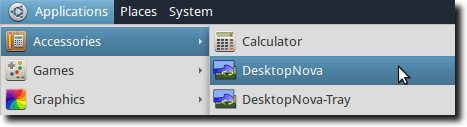
Once installed, you’ll find Gmediafinder in your Applications menu, under Sound & Video.

Launch Gmediafinder

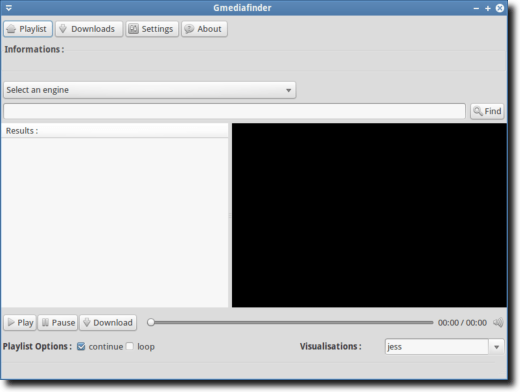
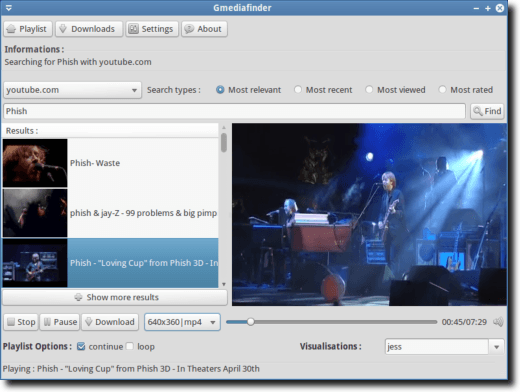
Gmediafinder has a nicely laid out interface, with obvious options that should be simple to figure out for most users.

Gmediafinder Interface

The top four buttons, labeled PlaylistDownloadsSettings and About are easy access buttons that take you to the Playlist screen (shown), to the Downloads interface (discussed below), to the Settings window or to the About screen.
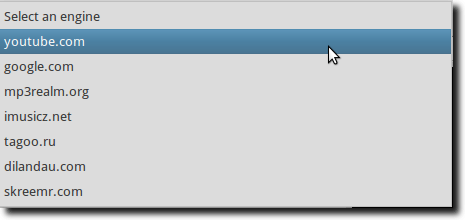
Below that is where you select the engine you want to search.  As mentioned, Gmediafinder supports YouTube for videos, Google for basic searches, as well as a host of MP3 sites.

Supported Search Engines

Once you’ve selected your search engine, enter what you want to find in the search box, and hit the Find button (or hit Enter on your keyboard).  Here we’ve searched YouTube for “Phish” and are watching a video, right in the main window.

Viewing YouTube Video

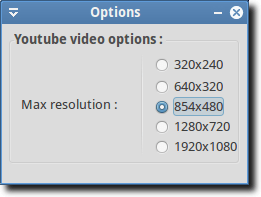
If we want, we can use the Playlist Options (at the bottom of the Playlist window), to either continue or loop through the playlist, for a neverending stream of videos (or music).  And we can download using Gmediafinder as well.  For MP3s, simply click the download button. YouTube videos can be downloaded in any of the supported sizes and formats; simply choose the one you want and click the download button.

Downloading Videos

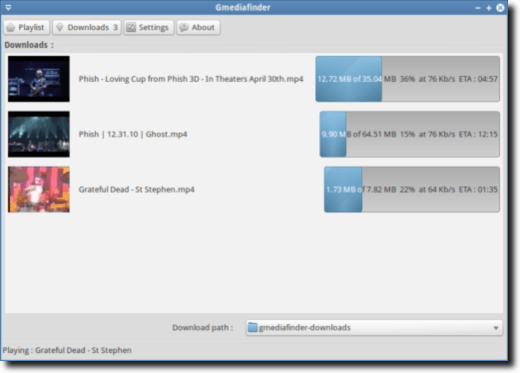
The built-in download manager is informative, but at the moment a little basic.  For instance, there’s currently no way to pause, or even cancel downloads, without resorting to quitting the program altogether.  And if you do quit the program in the middle of a download, that download is lost forever; you can’t restart Gmediafinder and pick up where you left off.
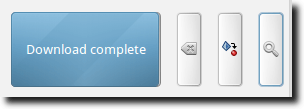
When a download is complete, you’ll see a few new buttons to the right of the progress field.

Download Complete Options

The first button is for deleting the entry from the download manager, the second – found only beside downloaded videos – is for converting the video’s audio to MP3, and the last is to view the file just downloaded.  Converting to MP3 is a nice touch, as you may find a custom remix of a song you want to listen to, without viewing the video.  The function works well, but at the moment you have no control over the quality of the conversion.
In fact, Gmediafinder is pretty much lacking in configuration options.

Gmediafinder Options

But don’t let the single YouTube option dissuade you from trying Gmediafinder.  It’s fast, easy to use, and for searching, viewing/listening, downloading and converting, it’s a tough combination to beat.

‘Super Boot Manager’ eases BURG, GRUB, Plymouth tweaking pains

Tweaking your GRUB bootloader to look pretty can often not only be confusing but leave you with a broken system should you get it wrong!
The newly launched ‘Super Boot Manager’ application, created by the developers behind graphical boot menu BURG, aims to streamline and simplify the process of tweaking boot ‘options’.
Super Boot manager is made up of three modules. Each one deals with a specific ‘boot’ function. You do not need to use all of them; if you want to tweak Plymouth alone simply use the ‘Plymouth’ module.
As with anything bootloader-related you are not advised to "mess" with GRUB unless you’re confident in what you’re doing and able to revert any changes.

GRUB Module

The GRUB module is capable of handling the most oft-used tasks, such as: -
  • One-click to re/install GRUB
  • Easy way to set the default boot OS
  • Change the GRUB screen resolution and menu time out
  • Remove old kernel/menu entries
  • Tweak text colours and set a background picture
  • Booting an .iso

buc_061-484x500-r80

Plymouth manager

The Plymouth module comes with some super helpful options. There is one-click enable/disabling of Plymouth itself, a gallery of alternative animated boot themes ready for easy download and, perhaps the jewel in the octopus-shaped crown, a one-click ‘proprietary driver’ fix that can help to turn a  garbled Plymouth boot under "official" drivers into something worth looking at.

buc_067-497x500-r80

BURG manager

Finally the option set many of you will be downloading the app for: the graphical bootloader BURG.
The BURG module in SBM comes with options not so dissimilar to that of GRUB, albeit with some added ‘visual’ goodness.
With one click can you install BURG itself to a hard drive of your choosing.
Set the default OS to boot into; set the screen resolution and timeout for the menu; easily install and enable  new themes (note that some may be considered inappropriate).
And the proverbial cherry-on-top comes in the form of a ‘BURG Removal’ button that wipes BURG away and reinstalls the traditional GRUB menu.
buc_069-485x500-r80

Download

Super Boot Manager is a free download and can be installed from a PPA, below, or manually downloaded and install  from sourceslist.eu.
The Super Boot Manager PPA provides packages for Ubuntu 10.04, 10.10 and 11.04.
  • sudo add-apt-repository ppa:ingalex/super-boot-manager
  • sudo apt-get update && sudo apt-get install buc super-boot-manager
Once installed search ‘super boot’ in the Unity Dash or look for ‘Super Boot Manager’ under the ‘System’ menu.

Thanks to Jan B

i copy and paste this from OMGUbuntu UK for own reference.

Rotate Your GNOME/Xfce Wallpapers With DesktopNova


Every operating system is customizable to a certain extent.  Some, such as Linux, offer an incredibly wide variety of icons and themes, with others, like Mac OSX, not offering much at all.  One option all operating systems have, however, is the ability to change the desktop background picture, or wallpaper.  In this instance, Mac OSX shines, as it offers the ability to rotate through a folder full of images at preset intervals, so you’re never looking at the same image for longer than you want.

Linux and Windows, however, don’t offer this ability, at least not by default.  There are utilities available for both that have this feature, and in this article we’ll be talking about DesktopNova, a utility for Linux.

DesktopNova, as mentioned, doesn’t come installed by default (or at least not in Ubuntu or other popular distributions), but Debian and Ubuntu users will find it already in their software repositories. Other Linux distributions will need to check their package manager, or download the source code from this page.
In Ubuntu, the quickest way to install DesktopNova is from the Terminal.  So first, go to the Applications menu, then Accessories.

Open Terminal

Next, type the following command: sudo apt-get install desktopnova desktopnova-module-gnome desktopnova-tray

note: in the above command, installing desktopnova-module-gnome enables desktopnova for linux distributions running the gnome desktop.  there is also an xfce module, so xubuntu users should install desktopnova-module-xfce instead.  desktopnova will not run without one or the other being installed.
Once installed, you’ll find two DesktopNova entries in the same Accessories menu where you found the Terminal.

Open DesktopNova

To get started, open the first option, leaving DesktopNova-Tray alone (for now).
When you open DesktopNova, you’ll see a single window with four tabs.  The Images tab is first.

Select Images or Folder

Here is where you can create profiles (for different users, themes or occasions), as well as how you identify which images or folders will be used.
The second tab, called Settings, is just that.

Session Options

It offers the ability to set the wallpaper change interval, whether or not DesktopNova should change your wallpaper every time you launch it (even if the change interval isn’t complete), and whether DesktopNova should autostart with your computer.
Third is the Tray-Icon tab.

Tray Icon Options

There are only two options here: first is whether or not to start the DesktopNova-Tray application at launch (which allows you to change the wallpaper manually), and whether mouse scrolling through your wallpaper choices should be turned off or on.
Finally, the Advanced tab.

Image Type Filter

Here you can type in as many file extension types as you want.  The ones you have listed will be shown, those you leave out will be ignored.  So if you have duplicate images in your folder, some in PNG and others saved as JPG, you can have DesktopNova show only one or the other, so you don’t get repeats as often.
As mentioned, the DesktopNova-Tray application allows you to move forward or backward between images, just with a couple clicks (or a flick of the mouse wheel).

Tray Icon

You can also access the DesktopNova preferences, see the about screen, or quit the tray icon entirely. DesktopNova isn’t an incredibly complex program.  It basically mimics the desktop wallpaper slideshow ability already present in GNOME, but allows you to choose images from different locations, and without editing any XML files.  It’s simple, but useful, and that should make it a nice addition for most Linux users.

Enable Snow on ubuntu desktop using compiz fusion

This tutorial shows how to enable snow on your ubuntu desktop using compiz fusion plugin.It is tested in ubuntu 9.10(karmic).
First,make sure you have compiz installed and enabled 3D effect.You can click here for this information.
Download following plugin:
for amd64 user:
compiz-fusion-plugins-unsupported_083git20090911-1ubuntu1_amd64
for i386 user:
compiz-fusion-plugins-unsupported_083git20090911-1ubuntu1_i386
double click to install,or use this in terminal(Applications/Accessories/Terminal):

sudo dpkg -i package_name

Update:

Previous deb package might be old for your Ubuntu, here is how to compile and install the snow plugin from source code.
First, install the required packages:

sudo apt-get install build-essential git libtool
Then,use git command to download the source:
git clone git://anongit.compiz.org/fusion/plugins/snow
Navigate to the new created folder, and make and make install:
cd snow
make && make install

Now, open CCSM and you should the the “Snow” option in Extras.

Setting Up :

After this,open System->Preferences->CompizConfig-Settings-Manager.TickSnow in Extra tab.
snow
Now,press win(Windows super key)+F3 key combination and see effect!
snow1

how to login as root in Ubuntu 11.04

enable root in ubuntu 11.04


Enable (Unlock) root on Ubuntu 11.04

1 : Open Terminal/shell , (hit CTRL+ALT+T)
2 : Then, Type the command (Followed by your Login Password).
sudo passwd root
3 : when you will be prompted for “Enter the New Unix Password” Twice, Enter the root password.
4 : That’s All, To enjoy root power, logout from the current user session. At the login window, Enter ‘root’ as a username and the password, you entered in above step.
Conclusion : In root mode, don’t perform any action about which you aren’t sure, because a single mistake can cause a lot of damage. If you just want to browse files in root mode, then you can browse nautilus in root mode with one simple trick.

Browse Files in Root Mode with Nautilus

Open terminal and enter the command (of course, followed by your login password).
sudo nautilus

how to install XFCE on Ubuntu 11.04


Installing XFCE Desktop on Ubuntu 11.04

step1 : Open terminal and type (You may need to authenticate yourself by login password):
sudo apt-get update
sudo apt-get install xfce4
step2 : Wait until the installation is complete. Next, logout from the current session and select Xfce session in login prompt.
step3 : That’s all.. Enjoy XFCE.. if you want to use other desktop then just select it at the login prompt.

gSharkDown Download music on Ubuntu


gSharkDown is a GNOME desktop application for downloading and playing audio files from the grooveshark  service. It is based on the groove-dl library from George Stephanos.

Features

Some of the importart features:
  • GNOME Desktop integration
  • Ease to use
  • Playlist with loop option
  • Song information with album picture
  • Remembers the playlist on exit
  • Notifications on track change (disabled by default)
  • Multimedia Keys support under GNOME Desktop

Dependenices

gSharkDown depends on the following libraries:
  • pygtk2 (python-gtk2 == 2.18)
  • ConfigObj (python-configobj)
  • python-gobject
  • python-gstreamer0.10
1.- Find your artist or song

2.- find your song and clicking on the +


Before you configure the folder where you download, the song right click on the icon bar of the program preferences, and finally her song download.

Download at https://bitbucket.org/vkolev/gsharkdown/downloads/gsharkdown_0.2.7-1_all.deb

Source and credit to The website for all Linux Mint users
Special thanks to Ubuntu Untuk Malaysia


Find Us On Facebook

Related Posts Plugin for WordPress, Blogger... Linux Directory